What Are the White Spots on My Sourdough Bread?
Sourdough bread is a favorite in lots of homes, appreciated not just for its unique flavor but also for its rustic look. But sometimes, bakers come across these puzzling white spots on their sourdough loaves, leaving them wondering what’s up.
In this article, we’re diving into the sourdough world, figuring out why these mysterious white spots show up on your sourdough bread, and giving you practical tips to make sure your sourdough baking is just as enjoyable as the bread you end up with.
Table of Contents
Toggle5 Common Causes of White Spots on Sourdough Bread
White spots on sourdough bread can result from various factors, ranging from flour contaminants to issues during the fermentation process. To maintain the quality of your sourdough, it’s crucial to identify and address these concerns promptly.
1. Flour Residue: The Invisible Culprit
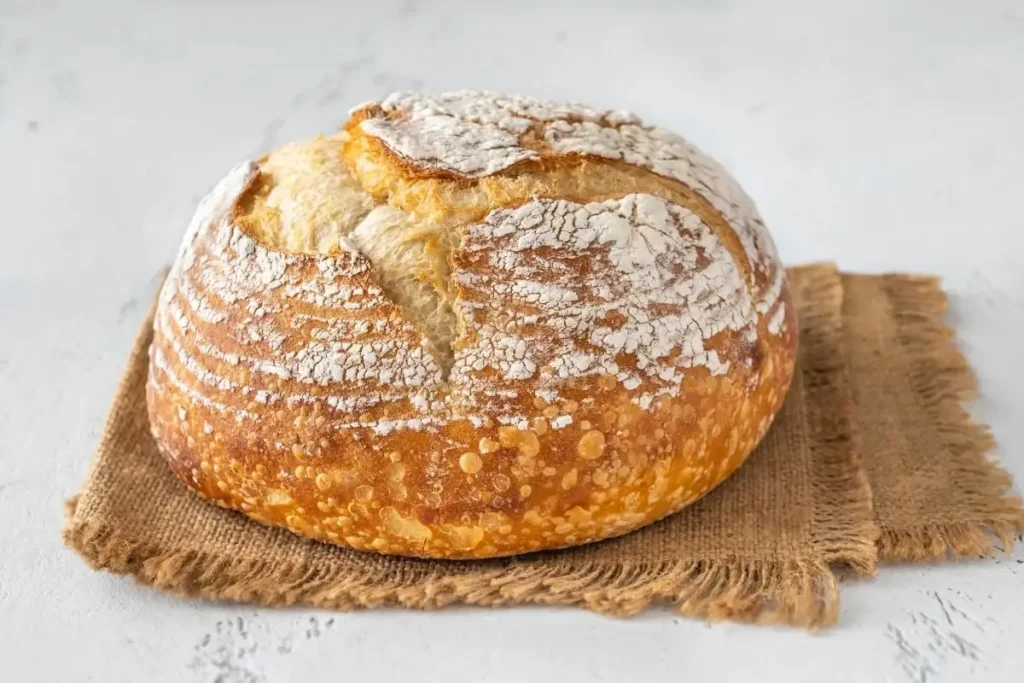
- How it happens: During the shaping and proofing stages, excess flour might cling to the surface of the dough. As the bread bakes, this residual flour can form white spots, creating an uneven appearance on the crust.
- Impact on the bread: While harmless, excessive flour residue can affect the texture and flavor of the crust. It may lead to a drier surface and a somewhat powdery taste.
- Minimizing flour residue: Ensure thorough mixing during the dough preparation and use only the necessary amount of flour for shaping. Lightly dust the surface, focusing on even distribution.
2. Salt Crystals: A Salty Surprise
- Understanding the role of salt: Salt is a crucial ingredient in sourdough, not just for flavor but also for regulating fermentation and strengthening the dough structure.
- Why salt crystals form: When salt isn’t evenly distributed in the dough, crystals may form on the surface during baking. This uneven distribution could be due to inadequate mixing or adding salt directly to the surface.
- Effect on taste and texture: While salt crystals are harmless, they can lead to pockets of intense saltiness in specific areas of the bread. Adjusting the distribution of salt during the mixing stage can help prevent this.

3. Fermentation Irregularities: The Heart of the Matter
- Causes of irregular fermentation: Inconsistent fermentation, whether too short or too long, can result in uneven texture and appearance. Insufficient fermentation may leave pockets, while over-fermentation can lead to collapsed areas.
- Identifying fermentation issues: Keep a close eye on the dough during the fermentation process. Signs like a lack of volume increase or excessive bubbling can indicate problems.
- Solutions for consistent fermentation: Maintain a consistent room temperature for fermentation, monitor the dough’s volume increase, and adjust fermentation times accordingly. Experimentation and keen observation are key.
4. Hygiene Matters: Cleanliness in Sourdough Making
- Importance of cleanliness: A clean workspace and utensils are paramount in sourdough baking. Residue from previous bakes or contaminants can lead to white spots.
- How to keep your tools and workspace clean: Regularly clean and sanitize your mixing bowls, utensils, and surfaces. Be meticulous in removing any remnants from previous bakes.
- Impact on preventing white spots: Maintaining cleanliness minimizes the risk of foreign substances causing irregularities in your sourdough’s appearance. A clean environment promotes a healthier fermentation process.
5. Dough Handling and Shaping Techniques
- Tips for a visually appealing sourdough: The way you handle and shape your dough significantly influences its final appearance. Inconsistent shaping or rough handling can create uneven surfaces and, consequently, white spots.
- Balancing aesthetics and taste: While aesthetics are important, striking a balance with the taste and texture of your sourdough should be the ultimate goal. Experiment with different shaping techniques to find the right fit for your preferences.
- Experimenting with decorative techniques: Consider incorporating decorative scoring patterns or flour dusting to enhance the visual appeal of your sourdough. These techniques not only add character but can also camouflage minor imperfections.

White Stuff on Bread: Mold or Flour Residue?
Encountering white spots on bread can be perplexing, leading to a common question: is it mold or just flour residue? Let’s delve into the nuances of both possibilities to help you discern and address this culinary mystery.
Mold: A Fungus Among Us
Mold on bread often appears as fuzzy, irregular patches, typically green, blue, or white. While the most common molds are black or green, certain varieties can indeed manifest as white. Mold growth is influenced by factors such as humidity, temperature, and the presence of spores in the environment.
If the white spots on your bread exhibit a fuzzy or irregular texture, it’s likely mold. In such cases, it’s advisable to discard the affected portions and inspect the rest of the loaf for any signs of contamination.
Flour Residue: The Innocent Culprit
On the other hand, white spots can be benign and simply indicative of flour residue. This is especially common in homemade or artisanal bread where excess flour may cling to the surface during shaping or proofing.
To differentiate, examine the texture of the white spots. Flour residue typically appears powdery or smooth, lacking the fuzzy or irregular characteristics of mold. While flour residue doesn’t pose health risks, it can affect the aesthetics and taste of the bread.
Mold Remediation:
- Isolate and discard: Immediately isolate any moldy portions, ensuring it doesn’t spread to the rest of the bread.
- Inspect other areas: Thoroughly check the entire loaf for additional mold growth.
- Prevent future contamination: Store bread in a cool, dry place, and consider refrigeration for longer shelf life.
Flour Residue Management:
- Gentle brushing: If the white spots are indeed flour residue, a gentle brush or tap can remove excess without compromising the bread’s integrity.
- Adjusting shaping techniques: Modify your dough handling and shaping methods to minimize excess flour sticking to the surface.

Storing Sourdough Bread to Avoid White Spots
Preserving the quality of your freshly baked sourdough extends beyond the oven. Proper storage is key to preventing the formation of unwanted white spots on your delightful loaves. Here’s a guide to storing your sourdough effectively.
When it comes to storage, the enemy is moisture. Excess humidity can lead to the development of white spots. Once your sourdough has cooled completely, transfer it to a breathable container or a paper bag. Avoid airtight containers as they can trap moisture and compromise the crust.
Refrigerating your sourdough bread can be beneficial, especially in warmer climates, but be cautious. Wrap your sourdough in a clean, dry cloth or paper towel before placing it in the refrigerator to absorb any excess moisture.
If you plan on consuming your sourdough within a day or two, storing it at room temperature in a bread box or a cool, dry place is ideal. Remember, the key is to maintain a balance—keeping the bread from drying out while preventing excessive moisture buildup.
By adopting these storage practices, you not only preserve the freshness of your sourdough but also reduce the likelihood of encountering those perplexing white spots, ensuring each slice is as visually appealing as it is delicious.
How to Tell If White Spots on Sourdough Bread are Safe or Unsafe
The sight of white spots on your freshly baked sourdough might raise concerns, but fear not – understanding whether these spots are safe or potentially problematic involves a closer examination.
- Color and Consistency: Safe white spots typically have a consistent color and texture. If they appear uniformly white and don’t deviate in consistency, it’s likely residue from flour or salt. On the other hand, irregular spots with varying shades might indicate issues with fermentation or hygiene.
- Smell Test: Give your sourdough a whiff. A pleasant, slightly tangy aroma is characteristic of a healthy, well-fermented loaf. If the smell is off, resembling anything sour or unpleasant, it could signal fermentation irregularities.
- Taste Matters: A foolproof method is, of course, the taste test. Safe white spots should have no adverse impact on the flavor. If your sourdough tastes as expected – a harmonious blend of tanginess and nuttiness – it’s likely safe to consume.
- Check the Crumb: Inspect the crumb – the interior texture of the bread. An even distribution of air pockets and a consistent texture throughout suggest a well-balanced fermentation process. If the crumb is uneven, dense in some areas, or excessively airy, it might indicate fermentation issues.
- Trust Your Instinct: Ultimately, trust your instincts as a baker. If something feels off during the baking process or if the finished loaf doesn’t align with your experience, it’s worth investigating further.

Tips for Preventing White Spots on Sourdough Bread
Savoring a perfect loaf of sourdough involves more than just following a recipe. To ensure your sourdough is spot-free and consistently delightful, consider these valuable tips:
- Invest in Quality Flour: The foundation of excellent sourdough starts with the flour. Opt for high-quality, unbleached flour with minimal additives. Quality flour not only enhances the taste but also reduces the risk of contaminants that may lead to those unwanted white spots.
- Master Proofing Times: Proofing, the fermentation period where the dough rises, is a critical phase. Experiment with different proofing times, adjusting based on room temperature and humidity. Finding the sweet spot ensures the dough rises adequately without crossing into the territory of overproofing, which can result in uneven textures and white spots.
- Prioritize Thorough Mixing: Achieving a consistent dough consistency is vital for spotless sourdough. Ensure all ingredients are thoroughly combined, leaving no pockets of unmixed flour. This not only prevents white spots but also contributes to a more uniform texture and flavor.
- Mind Your Kneading Technique: Proper kneading promotes gluten development, contributing to the desired structure of sourdough. Employ effective kneading techniques, ensuring even distribution of ingredients. This step reduces the likelihood of white spots while enhancing the overall quality of your bread.
- Consider Flour Hydration Levels: Maintaining the right hydration levels in your dough is crucial. Experiment with hydration ratios, adjusting according to the type of flour used. Consistent hydration contributes to a smoother dough texture, minimizing the risk of white spots.
- Use Filtered Water: The water you use in your sourdough can impact its quality. Consider using filtered water to eliminate potential contaminants that might contribute to white spots. Clean water ensures a purer dough, translating to a flawless loaf.
What Are the White Spots on My Sourdough Bread | Final Thoughts
In the world of making sourdough, it can get a bit confusing when you see weird white spots on your prized bread. This article has dug into the usual reasons for these spots, from leftover flour to fermentation hiccups, and given some practical fixes.
Whether it’s keeping things super clean, adjusting proofing times, or trying out new decorative tricks, each step matters for getting that perfect, tasty sourdough. Don’t forget, a sharp eye, a sniff for freshness, and trusting your gut are your best tools.
Armed with these tips, go ahead and dive into your sourdough adventure, making sure every slice looks and tastes amazing. Happy baking!
Lindsey Mackenzie
About me
Hi there! I’m Lindsey Mackenzie, the founder of Bake Smartly. Baking has been my passion since childhood, growing up in my father’s bakery. With Bake Smartly, I’m excited to share my love for all things sweet and savory. Join me on this delicious journey as we whip up scrumptious treats and sprinkle joy into every bite!


