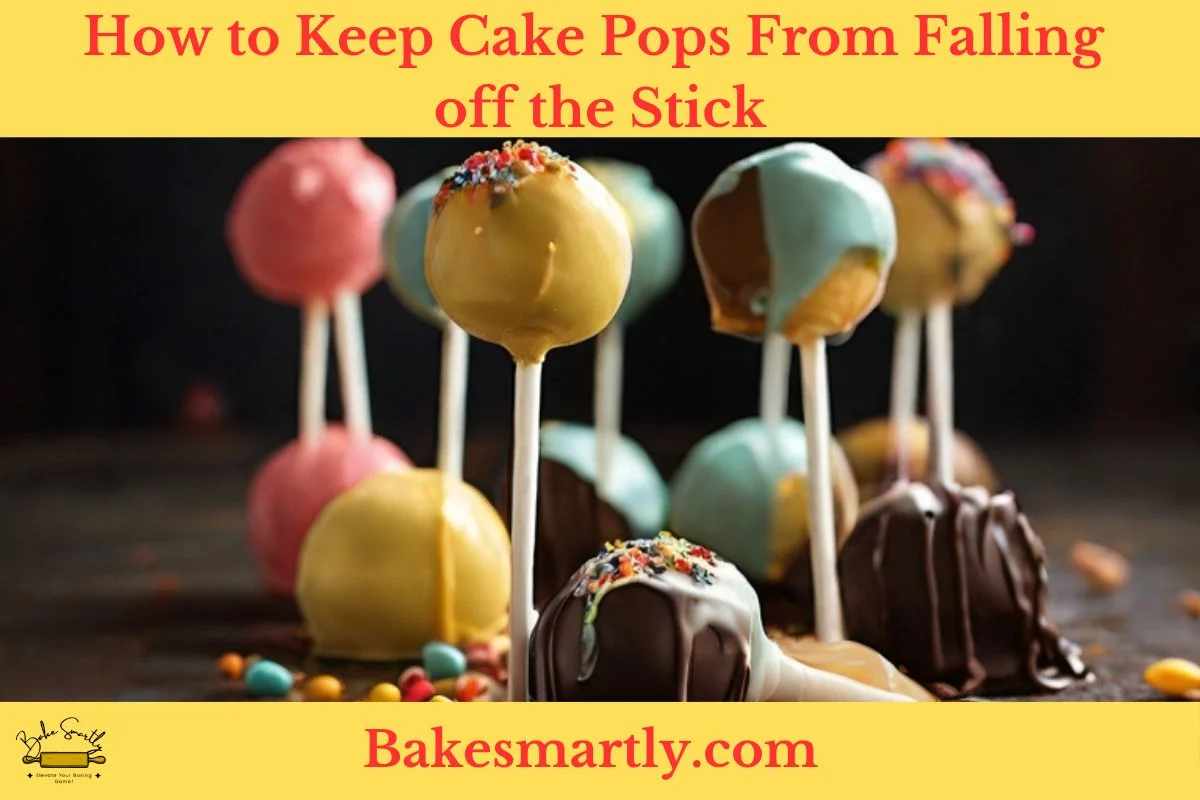
How to Keep Cake Pops From Falling off the Stick
Cake pops have become a favorite party treat, bringing together the goodness of cake and icing in a handy, bite-sized package. However, one common challenge that many bakers encounter when making cake pops is the frustration of seeing them fall off the stick.
If you’ve ever experienced this, fear not! In this blog, we’ll explore the reasons behind cake pops falling off the stick and provide you with practical tips to ensure your cake pops stay perfectly intact.
Table of Contents
ToggleWhy Are My Cake Pops Falling Off the Stick? | 3 Main Reasons
Perfecting cake pops is an art, and there’s nothing more disheartening than watching your carefully crafted treats fall off the stick. Understanding the reasons behind this common issue is the first step toward mastering the art of making cake pops.
Not Enough Binding Agent
One big reason cake pops fall off their sticks is that there’s not enough strong binding agent. Cake pops are crumbled cake mixed with something that holds it together, usually frosting. If the balance between the cake and frosting isn’t right, the mix might not stick well.
To fix this, make sure you have the correct ratio of cake to frosting and adjust if needed. A moist and well-mixed mixture will give your cake pops a solid base, keeping them on the stick during the dipping and setting process.
Not Chilling Long Enough
Getting the chilling right is super important in making cake pops. After shaping your cake pop mix into small rounds, they need enough time in the fridge to get firm. If you rush this part, your cake pops might not set properly, and they could wobble on the stick.
Let the cake pops chill for at least 1-2 hours, or as your recipe suggests. This helps the binding agent get solid, making sure your cake pops stay securely on their sticks.
Dipping Technique Issues
The dipping part is where many bakers face problems, and it leads to cake pops falling over. If the coating is too thick or too thin, it messes with how well the cake pop sticks to the stick. When dipping, make sure the coating is smooth and just right.
Holding the cake pop at a slight angle while dipping and tapping off extra coating gently can help you get a more even and secure coat. Also, let the coating set properly before the cake pops up to keep it from sliding too soon.

How to Prevent Cake Pops From Falling Off the Stick | 5 Expert Tips
Alright, now that you know the reasons let’s dive into five practical tips to make sure your cake pops stay put on their sticks.
1. Get the Cake Mix Right
The key to awesome cake pops is nailing the texture and stickiness of the cake mix. When you’re making your cake pops, it’s super important to hit that sweet spot where the cake sticks to the stick without falling apart. Bake your cake until it’s moist but not too wet.
Once it’s cooled, crumble it into fine bits and add just enough frosting to hold everything together. Be careful not to go overboard with the frosting – too much can make your cake pops slippery. Aim for a dough-like consistency that keeps its shape when rolled into a ball.
2. Size and Shape Matter
The size and shape of your cake pops seriously affect how well they stay on the sticks. When you’re shaping your cake mix into balls, make sure they’re all the same size. Consistency is key because uneven sizes can throw off the balance of the sticks.
Use a cookie scoop or your hands to make evenly sized balls, and make sure they’re firm enough to hold their shape but not too dense. Round cake pops work better on sticks than oddly shaped ones. Take a little extra time to make them uniform and well-formed for a stronger attachment.
3. Give Them a Chill
After shaping your cake pops, let them chill out in the fridge for at least 15 to 30 minutes until they’re nice and firm. Chilling helps them keep their shape and ensures the cake mix sticks well to the stick.
This step is extra important if you’re planning to dip your cake pops in melted chocolate or candy coating later on. The cold helps the coating harden quickly, giving your pops more support on the sticks.
4. Pick the Right Stick
The type of stick you choose makes a big difference in keeping your cake pops from taking a tumble. Go for sturdy sticks made of food-safe materials like paper or plastic. Wooden sticks are popular because they’re durable and can handle the weight of the cake pop.
Stick them right in the middle of each pop, about halfway through. Avoid putting them too close to the edge, or your cake pops might tip over. Choosing the right stick and putting it in the right way is a small but important detail for keeping your cake pops intact.
5. Candy Coating for Extra Security
To make sure your cake pops and sticks are tight, think about using candy coating as a sort of glue. Before dipping your pops into the melted coating, dip the tip of each stick into the coating and then stick it into the center of the pop.
This creates a glue-like bond that solidifies as it cools, giving your cake pop extra sticking power. Once the coating on the stick is set, go ahead and dip the whole cake pop into the melted coating for a smooth and even finish.
The candy coating not only makes your cake pop look better but also acts as a protective layer, keeping the cake from separating from the stick.
6. Mind the Temperature
Pay attention to the temperature when working with cake pops. If it’s too hot or humid, the cake pops may become soft, making them more prone to falling off the stick. Work in a cool, dry environment to maintain the integrity of your cake pops.
Additionally, avoid placing freshly dipped cake pops in the fridge immediately, as sudden temperature changes can cause cracks or separations. Allow them to set at room temperature before refrigerating if needed.
7. Double Dip for Stability
For an extra layer of security, consider double-dipping your cake pops. After the initial coating has been set, dip the cake pops again to add thickness to the shell.
This not only enhances the visual appeal but also provides additional stability, reducing the chances of the cake pops slipping off the sticks. Ensure that the first layer is fully set before applying the second coat to achieve a smooth and flawless finish.
Is it Possible to Save Cake Pops That Have Fallen Off the Stick?
Yes, it is possible to save cake pops that have fallen off the stick. Here are some steps you can take to fix them:
- Melted Chocolate or Candy Coating: Melt some chocolate or candy coating according to the package instructions. This will be used as a “glue” to attach the cake pop back onto the stick.
- Reattach the Cake Pop: Dip the end of the cake pop stick into the melted chocolate or candy coating. Gently insert the stick back into the cake pop, ensuring it goes through the center.
- Secure the Connection: Hold the cake pop in place for a moment to allow the melted chocolate or candy coating to set and secure the connection.
- Chill in the Refrigerator: Place the cake pops in the refrigerator for a short time to help the chocolate or candy coating harden and set completely.
- Decorate Again if Needed: If the cake pop loses some of its decorations during the process, you can reapply melted chocolate or candy coating and add sprinkles or other decorations while it’s still wet.
Do I Freeze Cake Pops with a Stick?
Freezing cake pops with a stick is a common and easy thing to do with a few important steps. First, make sure the cake pops are nice and cold in the fridge before moving them to the freezer. This initial chill helps them keep their shape and stops them from sticking together while freezing.
Once they’re chilled enough, wrap each cake pop in plastic wrap or put them in a sealed container, with parchment paper between layers. Freezing cake pops with the stick still on is great for planning, so they’re ready to enjoy whenever you want.
Just remember to thaw them in the fridge before letting them come to room temperature to keep their texture and flavor.
Frequently Asked Questions (FAQs)
Why are my cake pops falling off the stick when dipping?
Cake pops may fall off the stick during dipping if the cake mixture is too moist. Ensure the cake is thoroughly cooled before shaping. Additionally, applying a thin layer of melted chocolate to the stick before inserting it into the cake ball can help secure it during dipping.
How do you get the stick to stay in a cake pop?
To ensure the stick stays in a cake pop, dip the end of the stick in melted chocolate before inserting it into the cake ball. This acts as a glue, creating a stronger bond. Allow the chocolate to set before proceeding with the dipping process.
Why are my cake pops not sticking together?
Cake pops may not stick together if the cake mixture is too dry. Ensure the cake is moist enough, and when forming the balls, press them firmly to create a compact shape. Also, dipping the sticks in chocolate before inserting them can enhance adhesion.
How long do you have to refrigerate cake pops before dipping?
Refrigerate cake pops for at least 1-2 hours before dipping. Chilled cake pops have a firmer texture, making them easier to handle during the dipping process. This step helps the outer coating adhere better to the cake ball, resulting in a smoother and more even finish.
Conclusion
In conclusion, getting the hang of making awesome cake pops involves paying close attention to details and understanding the little things that might cause these tasty treats to tumble off their sticks. It’s crucial to get the right balance of binding agents, chill the pops properly, and nail the dipping technique.
Following some pro tips like getting the cake mix just right, keeping the size and shape consistent, choosing the right stick, and using candy coating for extra stability can take your cake pop skills to the next level. And don’t forget, if accidents happen, you can rescue fallen cake pops by adding a bit of melted chocolate or candy coating. Happy crafting with your cake pops!
Lindsey Mackenzie
About me
Hi there! I’m Lindsey Mackenzie, the founder of Bake Smartly. Baking has been my passion since childhood, growing up in my father’s bakery. With Bake Smartly, I’m excited to share my love for all things sweet and savory. Join me on this delicious journey as we whip up scrumptious treats and sprinkle joy into every bite!


