Why Sourdough Tears Happen (And How to Avoid Them)
Sourdough bread has gotten super popular lately, and I totally get why. It’s got this awesome taste and chewy texture, and it’s good for you too. But when I started making my own sourdough, I ran into a frustrating problem – my sourdough bread kept tearing.
Those ugly rips and splits in the crust were a real bummer, especially after I’d spent hours working on my dough. But I didn’t give up! Along the way, I picked up some useful lessons, and now I’m here to share them with you.
Let me tell you about this one time I was baking and had to deal with those dreaded sourdough tears. I followed a recipe carefully, measured everything precisely, and waited patiently for the dough to rise.
Everything seemed fine until I took my loaf out of the oven – and there they were, those annoying tears in the crust. I couldn’t figure out what went wrong. I’d done everything just like the recipe said, so why did my bread tear apart?
That experience pushed me to figure out why sourdough tears happen and how to stop them. After a lot of digging and testing, I found some great tips and tricks that have really improved my baking.
Now, I want to share what I’ve learned with you in this guide. We’ll dive into why sourdough tears happen and learn how to make sure our loaves turn out perfect every time.
Table of Contents
ToggleWhat are Sourdough Tears?
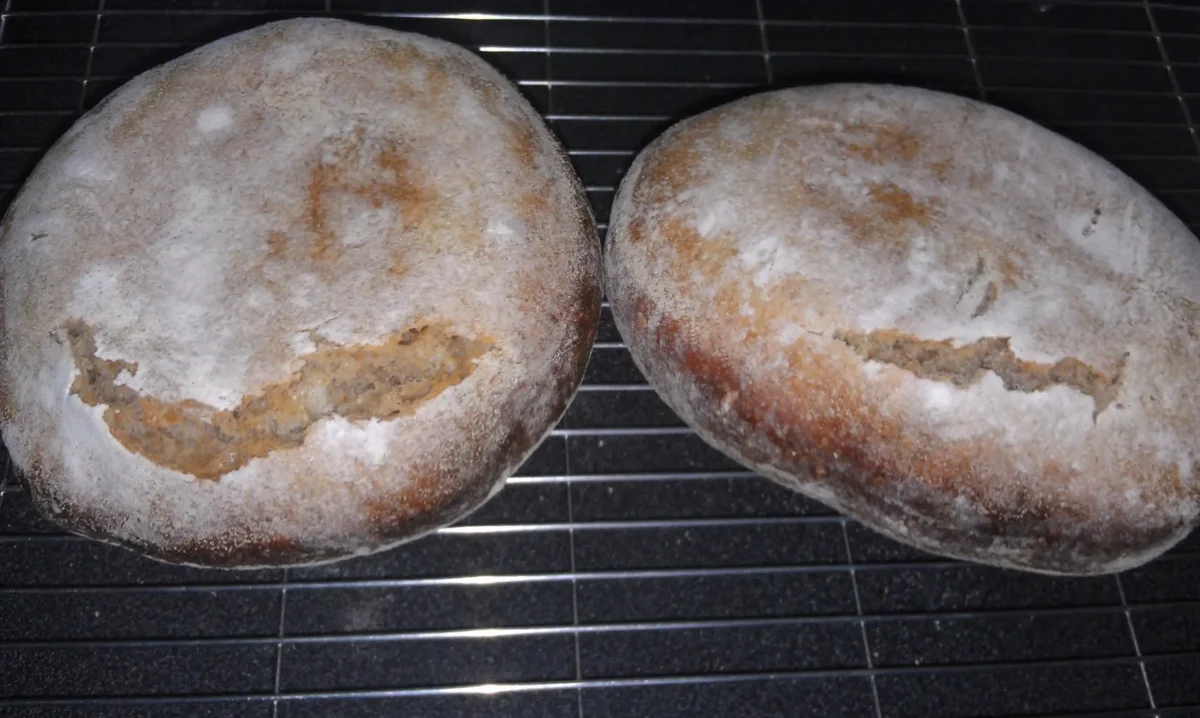
Before we dive into the causes of sourdough tears, let’s define what they are. Sourdough tears are cracks or fissures that form on the surface of sourdough bread during baking.
These tears can be caused by a variety of factors, including the dough’s hydration level, the type of flour used, the baking temperature, and the baking time. Sourdough tears can range in size from small, barely visible cracks to large fissures that split the bread in half.
3 Main Causes of Sourdough Tears
There are several reasons why sourdough tears happen.
1. One of the most common causes is an overly hydrated dough. When the dough is too wet, it becomes difficult to handle, and it can stick to your hands and the work surface. This can cause the dough to tear as you try to shape it.
2. Another cause of sourdough tears is insufficient gluten development. Gluten is a protein that gives bread its structure and helps it rise. If the gluten is not developed enough, the dough will not be able to hold its shape during baking, which can lead to tears.
3. Another factor that can contribute to sourdough tears is the type of flour used. Different flours have different protein levels, which can affect the gluten development and hydration level of the dough.
For example, bread flour has a higher protein level than all-purpose flour, which means it can absorb more water and develop more gluten. Using the wrong type of flour can lead to a dough that is too wet or has insufficient gluten, resulting in sourdough tears.
Why Sourdough Tears Happen (And How to Avoid Them)
Baking the perfect sourdough loaf requires a combination of art and science. Understanding why sourdough tears happen is crucial to troubleshoot the issue effectively.
Let’s explore the main factors contributing to this problem and learn how to overcome them.
1. Gluten Development Issues
Gluten, a protein formed when flour is mixed with water, provides structure and elasticity to bread. Proper gluten development is essential for a well-risen and tear-free loaf. Inadequate gluten development can lead to weak dough, resulting in tears during baking.
To ensure optimal gluten development:
Use high-protein flour: Opt for bread flour or all-purpose flour with a protein content of around 12-14%. These flours contain more gluten-forming proteins and promote better structure.
Knead the dough sufficiently: Proper kneading helps develop gluten. Perform the windowpane test to check gluten formation. Take a small piece of dough and gently stretch it. If it stretches thin without tearing, the gluten is adequately developed.
2. Insufficient Dough Strength
In addition to gluten development, the overall strength of your dough plays a crucial role in preventing tears. Weak dough lacks the structure and support needed to withstand the fermentation and baking process.
To improve dough strength:
Adjust hydration levels: Find the optimal hydration level for your recipe. High-hydration dough can be more challenging to handle, while low-hydration dough may lack elasticity. Experiment and find the sweet spot that yields a manageable yet strong dough.
Incorporate folding techniques: Regularly folding the dough during fermentation strengthens its structure. This technique also helps redistribute the yeast and gases, resulting in a more even rise.
Consider autolyse: Autolyse is a technique where flour and water are mixed and allowed to rest before adding the remaining ingredients. This resting period enhances gluten development and overall dough strength.

3. Improper Shaping and Tension
The shaping process is crucial to create tension in the dough, which contributes to a well-structured loaf. If the dough is not properly shaped or lacks tension, tears can occur during the baking process.
To master the art of shaping:
Use the right technique: There are various shaping methods, including the envelope fold, boule shaping, and batard shaping. Research and practice different techniques to find the one that suits your baking style.
Develop surface tension: When shaping your dough, create tension by pulling the dough taut. This surface tension helps the dough hold its shape and prevents tears.
4. Over Proofing
Over Proofing, or allowing the dough to ferment for too long, can lead to weak gluten and excessive gas production. This can result in an overly delicate dough prone to tearing.
To avoid overproofing:
Monitor fermentation time: Keep a close eye on your dough during the fermentation process. Follow the recommended proofing time in your recipe, but adjust accordingly based on environmental factors such as temperature.
Perform the poke test: The poke test is a reliable way to determine if your dough is ready for baking. Gently press your finger into the dough. If the indentation springs back slowly, the dough is properly proofed. If it springs back quickly, it needs more time. If it doesn’t spring back at all, it may be over-proofed.

5. Oven Spring
Oven spring refers to the rapid rise a loaf experiences during the first few minutes of baking. If the dough is not adequately scored or if the oven temperature is not sufficiently high, the expanding gasses can cause tears in the crust.
To optimize oven spring:
Score the dough: Before baking, make shallow, strategic cuts on the surface of the dough. This allows the loaf to expand and release steam without tearing.
Preheat the oven: Ensure your oven is properly preheated to the recommended temperature. A hot oven creates a burst of steam and heat, contributing to a strong initial rise and minimizing the chances of tearing.
6. Recipe Adjustments
Finally, certain recipe adjustments can help you achieve tear-free sourdough loaves. Consider the following factors:
Flour hydration: Experiment with different hydration levels to find the sweet spot for your preferred texture and crust.
Flour type: Different flours have varying protein contents and gluten-forming abilities. Explore various flours, such as rye, whole wheat, or spelt, to find the combination that suits your taste and baking goals.
Additives: Incorporate ingredients like malt powder, vital wheat gluten, or diastatic malt to enhance dough strength and improve texture.

How to Fix Sourdough Tears (3 Easy Fixes)
Even with the best intentions, sourdough tears can still happen. If you find that your bread has tears, don’t worry! There are a few things you can do to fix them.
Fix 1: Fill the cracks
To repair small tears in your bread, prepare a paste by combining equal parts flour and water. Mix them thoroughly and use a small spatula or knife to fill the cracks. Gently smooth the surface of the bread with your hands, ensuring the paste is well-distributed.
Proceed with baking the bread as usual, and the cracks will be mended, leaving you with a perfectly intact loaf.
Fix 2: Re-shape the dough
In the case of larger tears, the best approach is to re-shape the dough. Take extra care not to excessively stretch or pull it while doing so. Gently mold the dough into either a round or oval shape, carefully maintaining its integrity.
By re-shaping the dough, you can effectively conceal the tears and ensure a visually appealing final product.
Fix 3: Embrace the tears
When confronted with tears that are too significant to repair, fret not! Embrace these imperfections as a delightful part of your bread’s rustic charm. Sourdough bread with tears still possesses incredible flavor, and the cracks contribute to its unique character.
Rather than seeing them as flaws, appreciate the beauty in these irregularities, and savor the exceptional taste of your homemade loaf.
Frequently Asked Questions (FAQS)
Is it necessary to use high-protein flour for tear-free sourdough?
While high-protein flour is beneficial for gluten development and dough strength, it is not the sole determining factor. You can achieve tear-free loaves with other flours by adjusting hydration levels and incorporating proper techniques.
How do I know if my dough is properly hydrated?
Proper hydration is essential for dough strength. Your dough should feel slightly tacky and not overly sticky. It should be pliable and hold its shape without spreading too much. Adjust the hydration gradually until you achieve the desired consistency.
Can sourdough tears be fixed once they occur?
Unfortunately, once tears happen during baking, they cannot be fixed. However, with practice and the tips provided in this guide, you can minimize the chances of tears occurring.
What is the role of scoring in preventing tears?
Scoring helps release steam and allows the dough to expand during baking, reducing the chances of tears. It also adds an aesthetic touch to your loaf and creates distinctive patterns on the crust.
Why Sourdough Tears Happen | Conclusion
Mastering the art of baking tear-free sourdough loaves requires practice, patience, and an understanding of the factors that contribute to tears. By focusing on gluten development, dough strength, shaping techniques, proofing, oven springs, and recipe adjustments, you can significantly reduce the chances of tears occurring.
Lindsey Mackenzie
About me
Hi there! I’m Lindsey Mackenzie, the founder of Bake Smartly. Baking has been my passion since childhood, growing up in my father’s bakery. With Bake Smartly, I’m excited to share my love for all things sweet and savory. Join me on this delicious journey as we whip up scrumptious treats and sprinkle joy into every bite!


