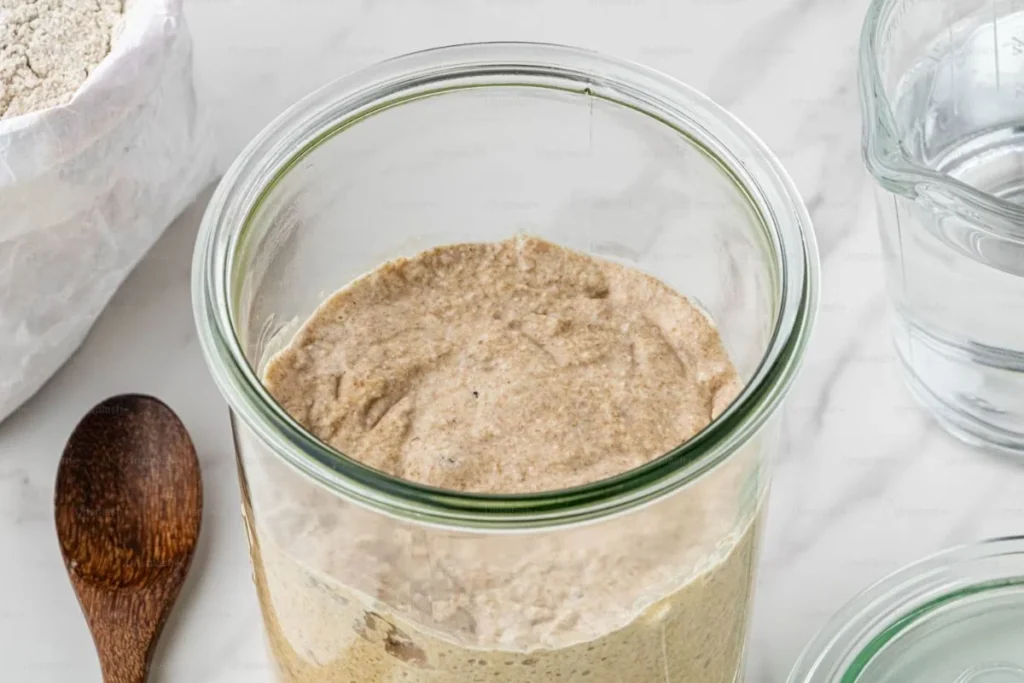
6 Reasons Your Sourdough Starter isn’t Rising and How to Fix It
Sourdough baking has become super popular lately, with lots of folks at home trying to nail down the perfect loaf. One big factor in getting that light, tasty sourdough is having a good, active sourdough starter. But if your sourdough starter isn’t rising as it should, it can be really frustrating.
In this blog, we’ll go over six common reasons why your sourdough starter might not be rising and give you three easy fixes to get it back on track.
Table of Contents
ToggleReason 1: Not Feeding Your Starter Enough
One of the primary reasons for a sluggish sourdough starter is an irregular or inadequate feeding schedule. Like any living organism, the microorganisms in your starter need a consistent and balanced supply of food to thrive.
If you slack off on feeding them, the yeast and bacteria might get weak and sluggish, which means your bread won’t rise as well.
To fix this, make sure you feed your sourdough every day, keeping a 1:1:1 ratio of starter, water, and flour. If it’s hot or cold where you are, you might need to adjust how often you feed it.
Reason 2: Wrong Environment
The place where you keep your sourdough matters a lot. Those wild yeasts and bacteria like it not too hot, not too cold—just right. If it’s too chilly or too warm, they won’t work their magic as well.
Keep your sourdough cozy at around 70-75°F (21-24°C). If it’s cold, find a warmer spot or use a heating pad. In hotter climates, look for a cooler spot or change up the feeding routine to keep things fermenting nicely.

Reason 3: Not Enough Water
Making sure your starter has the right amount of water is super important. If it’s too thick or too thin, it won’t trap the gases it needs to rise properly during fermentation.
Adjust how much water you add when you feed your sourdough until you get the right consistency. Starting with equal parts water and flour is a good plan, but you might need to tweak it a bit depending on what works best for you.
Reason 4: Using the Wrong Flour
The kind of flour you use makes a big difference. Some flours have more of the stuff the yeast and bacteria love to eat, which helps them grow.
Try using whole-grain flours like whole wheat or rye—they’ve got lots of good stuff in them. If your starter’s struggling, mix in more whole-grain flour. And go for unbleached, unbromated flours—they’ve got more natural nutrients that your starter will thank you for.
Reason 5: Contamination or pH Problems
Keeping things clean is key to keeping your starter happy. Bad stuff like bacteria or mold can mess up the balance in your starter, making your bread taste off and not rise well.
Keep your sourdough container clean and use filtered or dechlorinated water. And keep an eye on the pH—it should be a little acidic, between 4 and 5. If it gets too high or low, tweak your feeding routine or add a bit of something acidic like orange juice or apple cider vinegar.
Reason 6: Impatience
Sourdough baking takes time and patience. If you’re expecting quick results or perfect bread right away, you might mess things up by changing stuff too much.
Give your sourdough time to grow and get stronger. It might take a while—maybe even a few weeks—before it’s at its best. Try not to mess with the feeding routine or flour mix too often. Trust the process, and your bread will get better with time.

Three Easy Ways to Fix Your Sourdough Starter When It Won’t Rise
In this section, we will explore three easy methods to breathe life back into your starter and get it bubbling with activity.
1. Evaluate and Adjust Feeding Schedule:
The feeding schedule is crucial for maintaining a healthy sourdough starter. If your starter is not rising as expected, it may be an indication that it needs more frequent or larger feedings. Start by evaluating your current feeding routine.
- Assessment: Check the consistency and aroma of your starter. If it looks runny or has a strong, unpleasant odor, it might be hungry and in need of more frequent feedings.
- Adjustment: Increase the frequency of feedings or consider increasing the amount of flour and water you use during each feeding. Aim for a 1:1:1 ratio of starter, flour, and water. For example, if you have 50g of starter, add 50g of flour and 50g of water.
- Temperature Consideration: Pay attention to the room temperature. If it’s colder, your starter might need more time to ferment. Consider placing it in a warmer spot or adjusting the temperature of your surroundings.
- Consistency Check: Ensure your starter has a consistency similar to a thick pancake batter. If it’s too thin, add more flour during feedings to achieve the desired thickness.
2. Strengthening with Whole Grain Flours:
Whole grain flours contain more nutrients than white flour, providing an extra boost to your sourdough starter. If your starter seems sluggish, incorporating whole-grain flour can revitalize its activity.
- Whole Grain Benefits: Whole wheat or rye flours are excellent choices for reviving a slow starter due to their higher nutrient content. These flours provide essential minerals and micronutrients that foster the growth of yeast and bacteria.
- Feeding Ratio: Gradually introduce whole grain flour into your feeding routine. Start by replacing a portion of the white flour with whole grain flour, such as substituting 25% of the total flour with whole wheat or rye.
- Observation Period: Allow a few feedings with whole grain flours to observe changes. You should notice increased activity, as the additional nutrients support a more robust microbial community.
- Transition Back: Once your starter shows improvement, you can transition back to your regular feeding routine. However, periodically using whole grain flours can be beneficial for the long-term health of your sourdough starter.
3. Patience and Temperature Control:
Sourdough starters thrive in a stable and warm environment. If your starter isn’t rising, it might be due to suboptimal temperature conditions or impatience in allowing the fermentation process to take its course.
- Ideal Temperature Range: Sourdough starters generally perform best at temperatures between 75-85°F (24-29°C). If your kitchen is cooler, consider placing the starter in a warmer location or using a proofing box to create a controlled environment.
- Extended Fermentation: Sometimes, a sourdough starter may take longer to rise, especially in cooler temperatures. Allow for extended fermentation times, giving the microbial community more time to develop and flourish.
- Avoid Overfeeding: While it’s essential to maintain a regular feeding schedule, overfeeding can be counterproductive. If your starter is not rising, resist the urge to feed it excessively. Instead, focus on providing a stable and conducive environment for fermentation.
- Consistent Routine: Establishing a consistent routine for feeding and maintaining your sourdough starter is key. Sudden changes in feeding frequency or temperature can stress the microbial balance, leading to sluggish activity.

Expert Tips for Successful Sourdough Starter Rising
Fixing common issues is important, but it’s even better to take steps upfront to keep your sourdough starter healthy and prevent problems.
Here are some tips from the experts to make sure your sourdough starter rises well:
1. Stick to a Regular Feeding Routine: Experts say it’s crucial to feed your starter regularly, ideally every 12 hours. Doing this keeps the good bacteria and yeast in your starter happy and balanced. Consistency helps them grow strong, which means better rising for your dough.
2. Choose Good Flour: The kind of flour you use makes a big difference. Go for high-quality, unbleached flour like organic all-purpose or bread flour. They’ve got more nutrients and a wider variety of tiny organisms that make your starter thrive.
3. Watch Your Starter: Pay attention to what your starter does while it’s fermenting. Seeing how much it rises and falls between feedings tells you a lot about its health. If it consistently doubles in size a few hours after feeding, that’s a good sign.
4. Adjust Your Feeding Mix: Tweaking the ratio of flour to water in your feedings can help if your starter seems sluggish. Experiment with small changes until you find the right balance for better rising.
5. Add Some Whole Grain Flours: Mix in whole grain flours like whole wheat or rye when you feed your starter. They’ve got more nutrients and give the little organisms in your starter a wider range of foods to munch on. This variety helps keep your starter healthy and active.
6. Keep It Warm: Temperature matters for your sourdough starter’s home. Get a thermometer and put your starter somewhere consistently warm, like a proofing box, to help it grow. Aim for a temperature between 75-80°F (24-27°C) for best results.
Can I Use Sourdough Starter That Hasn’t Doubled?
Yes, you can use a sourdough starter that hasn’t doubled in size, but it might change how your bread turns out. Usually, when it doubles, it means it’s ready to go. If it hasn’t doubled, it might not be quite as mature or strong.
If you’re in a hurry, you can still go ahead and use it, but you might need to give it more time to ferment in your dough. Just let the dough rise until it doubles instead. Also, using a less active starter could give your sourdough a milder flavor.
Just keep in mind that stuff like the temperature around you, the type of flour you’re using, and other things can affect how active your sourdough starter is. If it’s not doubling consistently, you might need to tweak how often you feed it or where you keep it to help it grow stronger.
Is it OK to Let Sourdough Rise Overnight?
Yes, it’s pretty common to let sourdough rise overnight, and it’s usually part of making sourdough bread. Giving the dough more time to ferment can enhance the flavor and texture of the bread. This longer fermentation lets the natural yeast and bacteria in the sourdough starter break down the sugars and proteins, giving the bread a richer, more complex taste.
To do it overnight, you mix up the dough, let it rise for a bit (that’s called bulk fermentation), shape it into whatever shape you want, and then pop it in the fridge for a slow rise. This is called cold fermentation. The cold slows down the fermentation process, which helps the flavors develop more slowly and deeply.
Frequently Asked Questions (FAQS)
Why does my sourdough starter take 12 hours to rise?
The time for the sourdough starter to rise depends on various factors such as temperature, hydration, and the health of the starter culture. Generally, it can take anywhere from 4 to 12 hours, or even longer in some cases, for the starter to fully rise and become bubbly and active.
How long does it take the sourdough starter to rise?
A sourdough starter’s rise time can vary due to factors like temperature, hydration, and yeast activity. If it’s taking 12 hours to rise, it might need more warmth or a boost from feeding with fresh flour.
Can sourdough that didn’t rise be saved?
Yes, you can salvage sourdough that didn’t rise. Try adding a bit of commercial yeast to jumpstart fermentation, or let it ferment longer to develop flavor. Alternatively, repurpose it into flatbreads or crackers where the rise is less crucial.
What temperature kills sourdough starter?
Extreme temperatures can harm sourdough starters. While it’s resilient within a certain range, temperatures above 120°F (49°C) or below freezing can kill the yeast and bacteria, halting fermentation and potentially spoiling the starter.
Sourdough Starter isn’t Rising | Final Thoughts
Fixing a sourdough starter that won’t rise takes a mix of science, watching closely, and a bit of waiting. By tackling these six usual problems, you can bring your sourdough starter back to life and start baking with better results.
Just keep in mind, that every sourdough starter is different, and figuring out what works best for yours is part of the fun of artisan baking.
Lindsey Mackenzie
About me
Hi there! I’m Lindsey Mackenzie, the founder of Bake Smartly. Baking has been my passion since childhood, growing up in my father’s bakery. With Bake Smartly, I’m excited to share my love for all things sweet and savory. Join me on this delicious journey as we whip up scrumptious treats and sprinkle joy into every bite!


