5 Types of Bread Making Methods and How To Use Them
Making bread is a timeless cooking skill that’s developed over many years, resulting in a bunch of bread types with unique tastes, feels, and smells.
In this detailed guide, we’ll dig into five ways to make bread, giving you a step-by-step look at each method.
Whether it’s the classic Traditional Yeast Bread, the interesting Sourdough Method, or the health-focused Gluten-Free Method, we’ll examine the details of each technique to assist you in becoming a bread-making pro.
We also provide bread recipe suggestions and expert tips for each bread-making method
Table of Contents
ToggleUnderstanding the Different Types of Bread Making Methods
Exploring the world of bread making reveals various methods that create a variety of delicious bread. Both new bakers and experienced artisans need to understand these different approaches.
Some folks stick to the traditional ways, like the ancient craft of making artisanal bread. This involves slow fermentation and careful handwork, passed down through the years, resulting in tasty loaves with a crusty outside and unique textures.
On the flip side, modern methods use technology and machines to speed up the process of mass production.
Sourdough lovers have their special way, of relying on wild yeast and lactic acid bacteria for fermentation. This gives the bread a tangy flavor and makes it easier to digest.
On the other hand, quick bread methods, like those for muffins or banana bread, skip the fermentation part and use chemical leaveners to rise quickly.
For those with dietary preferences or restrictions, gluten-free and alternative flour methods show how adaptable bread-making can be. Whether you’re into the old-school traditions or trying new techniques, understanding these methods opens up a world of cooking possibilities.
5 Types of Bread Making Methods | Step-by-Step Guide
In this section, we’ll explore five ways to make bread, giving you simple step-by-step instructions to help you become a pro at baking.
Whether you’re into the classic yeast bread or the fancy sourdough method, each way gives you a unique approach to creating delicious homemade bread.
1. Traditional Yeast Bread (Straight Dough Method)
The Traditional Yeast Bread method, also known as the Straight Dough Method, is a timeless approach to bread making that relies on the interaction between flour, water, yeast, and salt.
This method is characterized by its simplicity, making it a perfect starting point for beginners. Here’s a step-by-step guide to creating a delicious Traditional Yeast Bread:
Ingredients:
- 4 cups of all-purpose flour
- 1 tablespoon of active dry yeast
- 1 1/2 cups of warm water
- 2 teaspoons of salt
Instructions:
- In a large mixing bowl, combine the warm water and yeast. Allow it to sit for 5-10 minutes until it becomes frothy.
- Add the flour and salt to the yeast mixture, stirring until a dough forms.
- Knead the dough on a floured surface for about 10 minutes until it becomes smooth and elastic.
- Place the dough in a greased bowl, cover it with a damp cloth, and let it rise for 1-2 hours or until it doubles in size.
- Punch down the dough, shape it into a loaf, and let it rise again for 30-60 minutes.
- Preheat the oven, bake the bread until golden brown, and enjoy the aroma of freshly baked bread.

2. No-knead Method
The No-knead Method revolutionized home bread making by simplifying the process and reducing the effort required. Developed by artisan bread enthusiasts, this method relies on longer fermentation to develop gluten structure without kneading.
Here’s a step-by-step guide to the No-knead Method:
Ingredients:
- 3 cups of all-purpose flour
- 1 1/2 teaspoons of salt
- 1/4 teaspoon of instant yeast
- 1 1/2 cups of lukewarm water
Instructions:
- In a large mixing bowl, combine the flour, salt, and instant yeast.
- Add the lukewarm water, stirring until a shaggy dough forms.
- Cover the bowl with plastic wrap and let it rest at room temperature for 12-18 hours.
- After the initial fermentation, shape the dough and let it rise for an additional 1-2 hours.
- Preheat the oven with a covered Dutch oven inside.
- Transfer the dough to the hot Dutch oven, cover, and bake. Remove the cover for the last 15 minutes to achieve a golden crust.
3. Sourdough Method
Sourdough bread is renowned for its unique tangy flavor and chewy texture, attributed to the wild yeast and lactobacilli present in a sourdough starter. Here’s a step-by-step guide to mastering the Sourdough Method:
Ingredients:
- 1 cup of active sourdough starter
- 3 cups of bread flour
- 1 1/2 teaspoons of salt
- 1 1/2 cups of lukewarm water
Instructions:
- In a large bowl, combine the sourdough starter, flour, salt, and water.
- Mix until a sticky dough forms, then let it rest for 30 minutes.
- Perform a series of stretch-and-folds every 30 minutes for the first 2 hours.
- Cover the bowl and let the dough rise for 4-12 hours, depending on your schedule.
- Shape the dough, place it in a floured proofing basket, and let it rise for an additional 2-4 hours.
- Preheat the oven, score the bread, and bake until you achieve a golden brown crust and a hollow sound when tapped.

4. Gluten-Free Method
For those with gluten sensitivities, the Gluten-Free Method provides a wonderful alternative, allowing everyone to enjoy the pleasure of homemade bread.
Here’s a step-by-step guide to crafting a delightful Gluten-Free Bread:
Ingredients:
- 2 cups of gluten-free flour blend
- 1 teaspoon of xanthan gum
- 1 packet (2 1/4 teaspoons) of active dry yeast
- 1 1/4 cups of warm water
- 2 tablespoons of sugar
- 2 tablespoons of olive oil
- 1 teaspoon of salt
Instructions:
- In a small bowl, combine the warm water, sugar, and active dry yeast. Let it sit for 5-10 minutes until it becomes frothy.
- In a large mixing bowl, combine the gluten-free flour blend, xanthan gum, and salt.
- Add the yeast mixture and olive oil to the dry ingredients, mixing until a sticky dough forms.
- Transfer the dough to a greased loaf pan, cover it with a damp cloth, and let it rise for 30-45 minutes.
- Preheat the oven and bake the gluten-free bread until it reaches an internal temperature of 200°F (93°C).
5. Preferment Method
The Preferment Method, also known as the sponge or poolish method, involves creating a pre-fermented mixture that enhances flavor and texture. This method is commonly used in artisan bread making. Here’s a step-by-step guide to the Preferment Method
Ingredients:
- 1 cup of bread flour
- 1 cup of lukewarm water
- 1/4 teaspoon of instant yeast
Instructions:
- Create the Preferment: In a bowl, combine 1 cup of bread flour, 1 cup of lukewarm water, and 1/4 teaspoon of instant yeast. Mix thoroughly to form a smooth batter. Cover the bowl and let the preferment ferment at room temperature for 12-16 hours. This prolonged fermentation allows the yeast and bacteria to work their magic, producing flavorful byproducts that contribute to the overall taste of the bread.
- Incorporate into the Final Dough: Once the preferment is ready, it is incorporated into the final dough. Additional ingredients such as flour, water, yeast, and salt are added to achieve the desired consistency. The preferment imparts its unique character to the dough, enhancing both the aroma and taste of the bread.
- Knead and Rise: After combining the preferment with the remaining ingredients, knead the dough until it reaches the desired texture. Allow the dough to rise for the recommended time, permitting the flavors to further develop and the gluten structure to strengthen.
- Shape and Final Rise: Shape the dough according to your preference and let it undergo the final rise. This step ensures that the bread attains its desired size and structure before baking.
- Bake to Perfection: Preheat the oven and bake the bread until it reaches a golden brown hue, capturing the essence of the Preferment Method in every slice.

Popular Bread Recipes for Each Bread Making Method
Exploring the world of bread making not only involves understanding different methods but also opens the door to a myriad of delicious recipes. Here, we present popular bread recipes for each of the five bread-making methods discussed earlier:
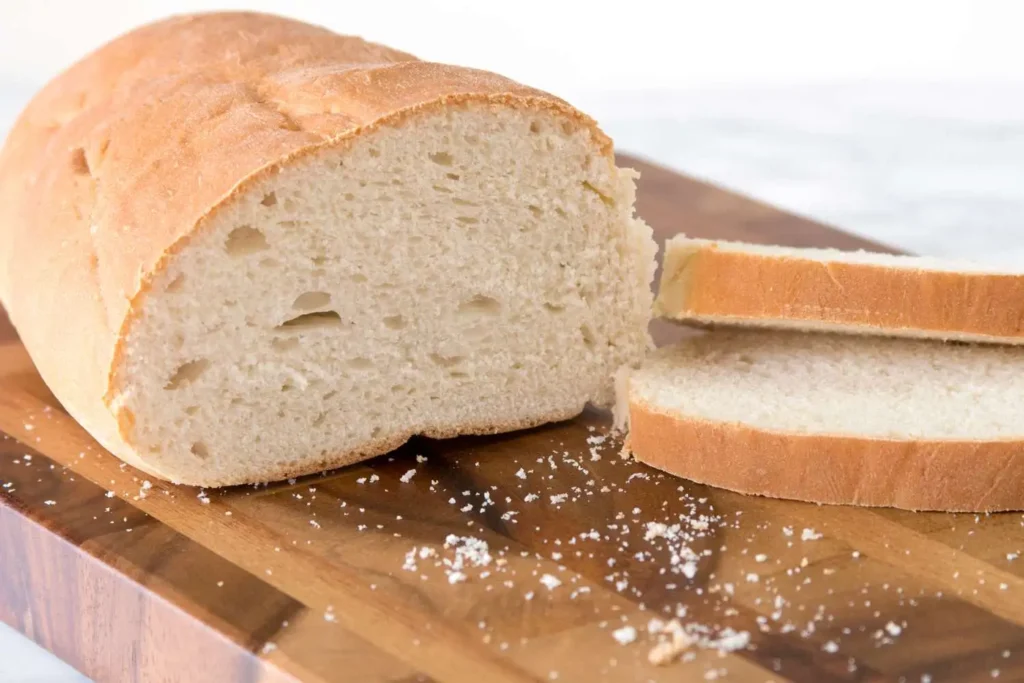
Classic White Loaf (Traditional Yeast Bread ):
Ingredients: 4 cups all-purpose flour, 1 tablespoon active dry yeast, 1 1/2 cups warm water, 2 teaspoons salt.
Steps: Make a soft and fluffy white loaf perfect for sandwiches or toasting by following the steps of the Traditional Yeast Bread method mentioned earlier.
Artisan No-Knead Bread (No-knead Method):
Ingredients: 3 cups all-purpose flour, 1 1/2 teaspoons salt, 1/4 teaspoon instant yeast, 1 1/2 cups lukewarm water.
Steps: Capture the rustic charm of artisan bread with this no-knead recipe. Let the dough ferment for an extended period, resulting in a chewy inside and a crusty outside. Follow the instructions of the no-knead method.
Classic Sourdough Boule (Sourdough Method):
Ingredients: 1 cup active sourdough starter, 3 cups bread flour, 1 1/2 teaspoons salt, 1 1/2 cups lukewarm water.
Steps: Bring out the distinct tangy flavor of sourdough with this recipe. Follow the Sourdough Method steps to create a round boule with a crispy crust and an airy, hole-speckled inside.
Homemade Gluten-Free Sandwich Bread (Gluten-Free Method):
Ingredients: 2 cups gluten-free flour blend, 1 teaspoon xanthan gum, 1 packet active dry yeast, 1 1/4 cups warm water, 2 tablespoons sugar, 2 tablespoons olive oil, 1 teaspoon salt.
Steps: Create a soft, gluten-free loaf suitable for sandwiches by following the Gluten-Free Method. This recipe ensures those with gluten sensitivities can enjoy tasty homemade bread.
French Baguette with Poolish (Preferment Method):
Ingredients (for Poolish): 1 cup bread flour, 1 cup lukewarm water, 1/4 teaspoon instant yeast.
Additional Ingredients: Incorporate the Poolish into a standard baguette recipe, adding flour, water, yeast, and salt.
Steps: The Preferment Method adds depth to this French classic, resulting in a baguette with a crispy crust and a nuanced flavor profile.

Tips for Successful Bread-Making
Making the perfect loaf of bread goes beyond just sticking to a recipe. Check out these crucial tips to make sure your bread turns out great, no matter which method you choose:
- Quality Ingredients: Start with top-notch ingredients. Fresh, high-quality flour, yeast, and water are key to getting tasty and nicely textured bread. Don’t forget about salt—it amps up the overall flavor and helps control yeast activity.
- Accurate Measurements: Be precise when measuring ingredients. Invest in a reliable kitchen scale for accurate measurements. Consistency ensures a balanced and dependable outcome with every batch.
- Room Temperature Ingredients: Let ingredients like eggs, water, and even flour reach room temperature before adding them to your dough. This helps the yeast work more efficiently and encourages better gluten development.
- Kneading Techniques: Understand the importance of kneading in traditional bread making. Proper kneading builds gluten, giving the bread structure and elasticity. If you’re using no-knead or sourdough methods, follow the suggested resting and folding steps for the desired texture.
- Proper Fermentation: Patience is key in bread making. Let the dough ferment adequately during rising periods. This step adds to the flavor and texture development. Stick to the suggested rising times for each specific bread-making method.
- Preheating and Baking Temperature: Preheat your oven thoroughly before baking. Consistent heat is crucial for proper rising and a well-formed crust. Get an oven thermometer for accuracy. Follow the recommended baking temperature for the type of bread you’re making.
- Steam in the Oven: For a crisp, golden crust, introduce steam into the oven during the initial part of the baking process. You can do this by placing a pan of water in the oven or using a spray bottle to mist the dough before baking.
- Cooling and Storage: Let your freshly baked bread cool completely on a wire rack before slicing. Cutting into hot bread can result in a gummy texture. Once cooled, store the bread in a breathable container to keep it fresh.
- Experiment and Learn: Don’t hesitate to try different flours, hydration levels, and extra ingredients. Bread making is as much about personal preference as it is about following a recipe. Keep a bread-making journal to track your experiments and learn from each batch.
Final Thoughts
In conclusion, getting into the art of making bread opens up a world of tasty possibilities in the kitchen. Whether you’re into the classic Traditional Yeast Bread or the game-changing No-knead Method, each technique offers a unique journey to whip up delicious loaves.
Whether you’re diving into the slow fermentation of Sourdough or trying out different flours with the Gluten-Free Method, understanding these diverse approaches helps both new bakers and experienced pros.
The step-by-step guides, expert tips, and popular recipes provided here aim to give you the knowledge to become a skilled bread maker.
Just remember, successful bread making is an art that mixes tradition with experimentation—so, get your hands dirty, enjoy the process, and relish in the delight of freshly baked bread. Happy baking!
Lindsey Mackenzie
About me
Hi there! I’m Lindsey Mackenzie, the founder of Bake Smartly. Baking has been my passion since childhood, growing up in my father’s bakery. With Bake Smartly, I’m excited to share my love for all things sweet and savory. Join me on this delicious journey as we whip up scrumptious treats and sprinkle joy into every bite!


