8 Proofing Basket Alternatives to Use for Your Sourdough Bread
Baking sourdough bread has turned into a kind of art, where people try out different methods to get that ideal loaf. One really important part of the process is letting the dough rise and develop its special flavor.
Usually, proofing baskets, also called bannetons, have been the preferred choice for shaping and proofing sourdough.
But there are plenty of other options that can give you similar or even better results. In this blog post, we’ll check out eight alternatives to proofing baskets that can take your sourdough bread baking to the next level.
Table of Contents
ToggleWhat is Proofing?
Proofing is a crucial stage in the art of bread making, especially in the context of sourdough. This process refers to the final rise that the shaped dough undergoes before entering the oven.
During proofing, the yeast in the dough ferments, producing carbon dioxide, which causes the bread to rise and develop its characteristic texture and flavor.
It is a delicate balance of time, temperature, and humidity, allowing the dough to reach its full potential. Traditionally, proofing is done in specialized containers known as proofing baskets or bannetons, but various alternatives exist.
What Is A Proofing Basket?
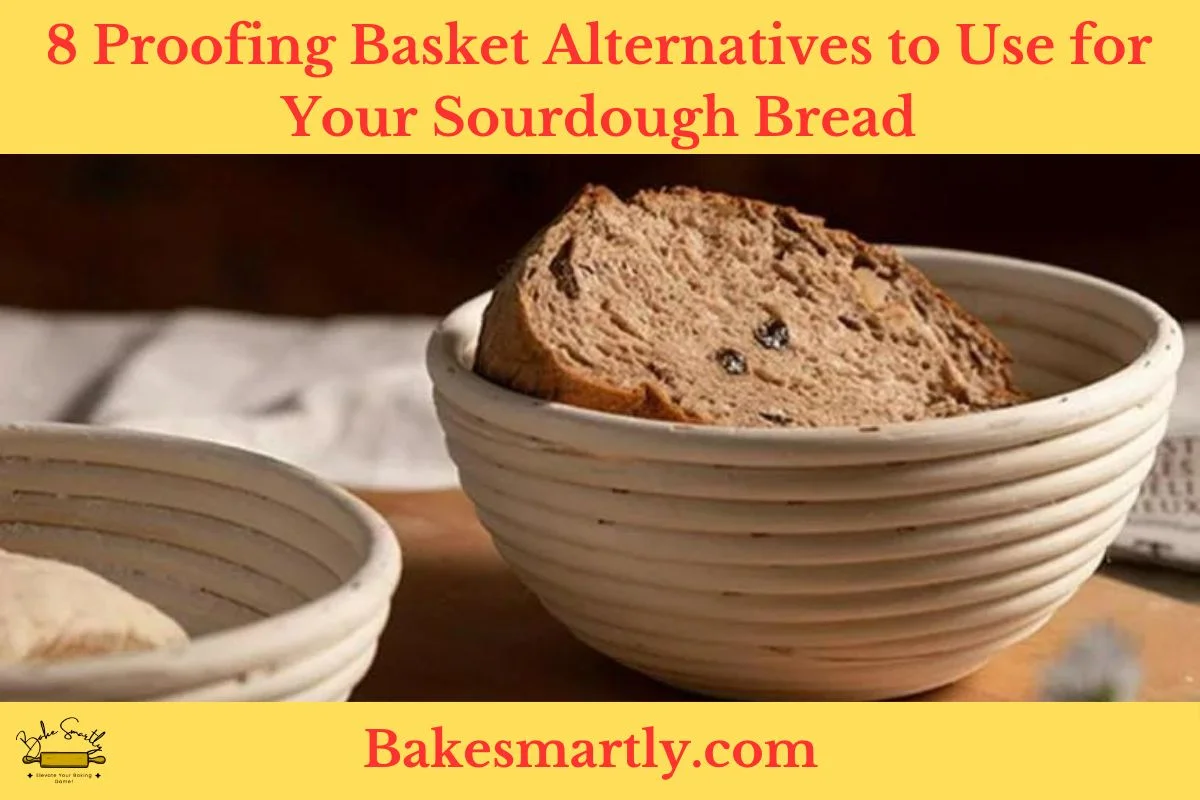
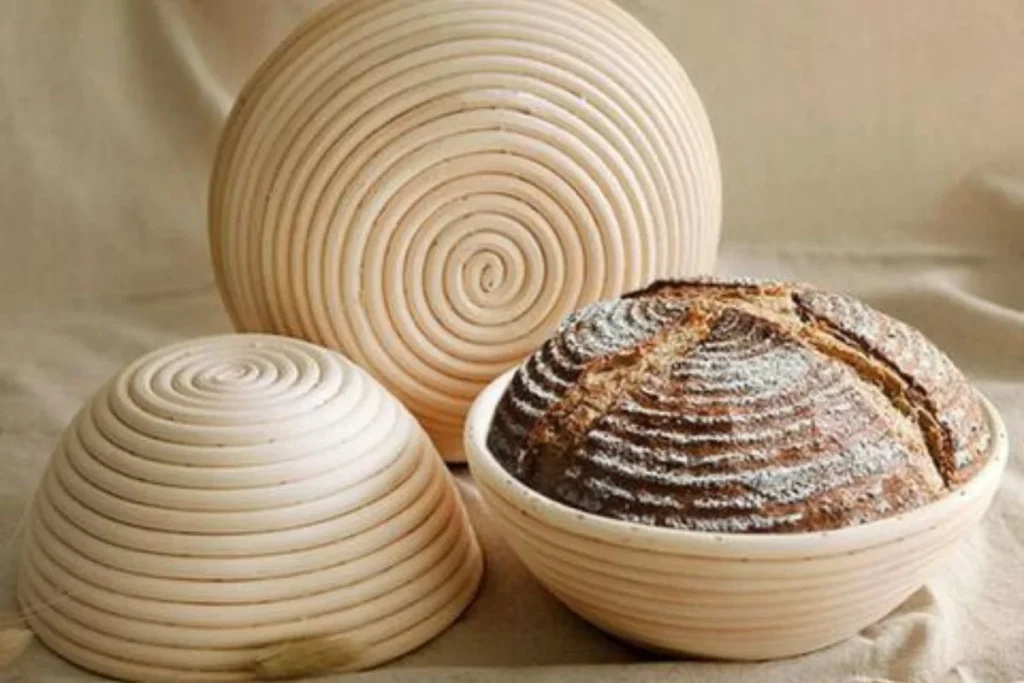
A proofing basket, also known as a banneton or brotform, is a specialized container designed for the final rise of bread dough, particularly in artisanal and sourdough bread making. Crafted from natural materials like cane or wood, these baskets play a pivotal role in shaping the dough and developing its texture.
The intricately woven structure of the basket provides support to the dough during fermentation, allowing it to maintain its shape and rise evenly. The basket’s design creates a pattern on the bread’s crust, contributing to its visual appeal.
With its breathable and moisture-absorbing qualities, a proofing basket fosters an ideal environment for yeast activity, resulting in a lighter, airier crumb and a crust with that coveted artisanal appearance.
8 Proofing Basket Alternatives and How to Use Them
Traditional proofing baskets, also known as bannetons, have long been favored by bakers for shaping and proofing dough. However, if you find yourself without a proofing basket, fear not! There are alternative methods using common kitchen items that can produce equally excellent results.
Here are eight proofing basket alternatives and how to use them:
1. Bowl and Towel Method
If you don’t have a fancy proofing basket, no worries! Grab a bowl, something around the size you’d use for your bread. Sprinkle some flour inside to keep the dough from sticking. After shaping your dough, toss it seam-side down into the floured bowl.
Cover the bowl with a clean kitchen towel, making sure it’s big enough to cover the dough without touching it. Let the dough rise like you normally would. The towel helps create a warm, slightly humid space, which is perfect for yeast action and dough expansion.
When it’s time to bake, carefully flip the bowl onto a baking sheet to release the dough gently.
2. Lined Colander Technique
Guess what? A colander can work wonders as a proofing basket. Find a clean one and line it with a generously floured kitchen towel to keep the dough from sticking. Shape your dough and place it seam-side up in the floured colander.
Cover it with another kitchen towel and let it rise. The colander supports the dough as it rises, giving your bread a unique shape and texture. When it’s time to bake, carefully move the dough from the colander to a preheated baking surface.
3. Glass Bowl with Plastic Wrap
If you’re missing a traditional proofing basket, grab a glass bowl. Make sure it gives your dough room to expand. Give the bowl a light coating of oil to prevent sticking. Shape your dough and place it seam-side down in the oiled bowl.
Cover the bowl tightly with plastic wrap. The plastic wrap seals in the natural moisture released by the dough as it rises, preventing it from drying out and giving you a soft, evenly risen loaf. When you’re ready to bake, carefully flip the bowl onto a baking sheet, letting the dough gracefully release onto the surface.
4. Silicone Molds
Silicone molds, usually used for baking cakes or muffins, can double as proofing baskets. Pick a mold that fits your bread size. Lightly grease the inside to keep the dough from sticking. Shape your dough and place it seam-side down in the greased mold.
Cover it with a kitchen towel and let it rise. Silicone molds provide excellent support for the dough, creating a distinct shape and crust. When it’s time to bake, carefully release the dough from the mold onto a baking surface.
5. Banneton Cloth
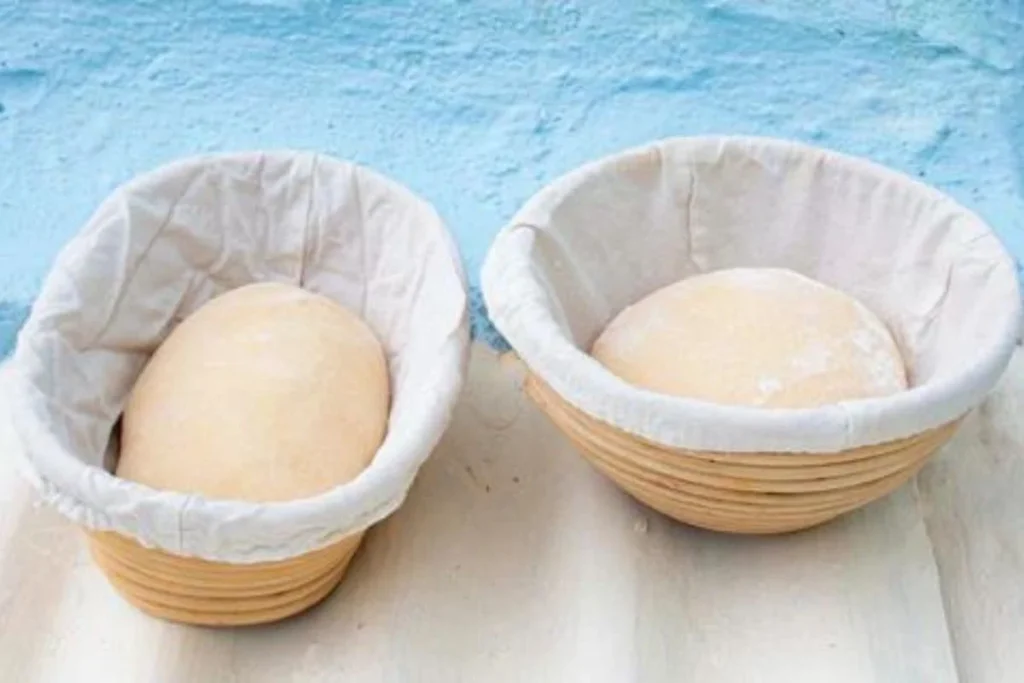
If you’ve got a Banneton basket but no cloth liner, don’t worry. You can use a linen or cotton cloth instead. Just generously dust the cloth with flour and place it inside the Banneton, making sure it covers the whole inside.
Shape your dough and put it seam-side down in the floured cloth-lined basket. The cloth helps prevent sticking and gives your dough a smooth surface to rise against. When it’s time to bake, gently flip the Banneton to release the dough onto your baking surface, revealing a beautifully patterned imprint.
6. Bowl Covered with Damp Cloth
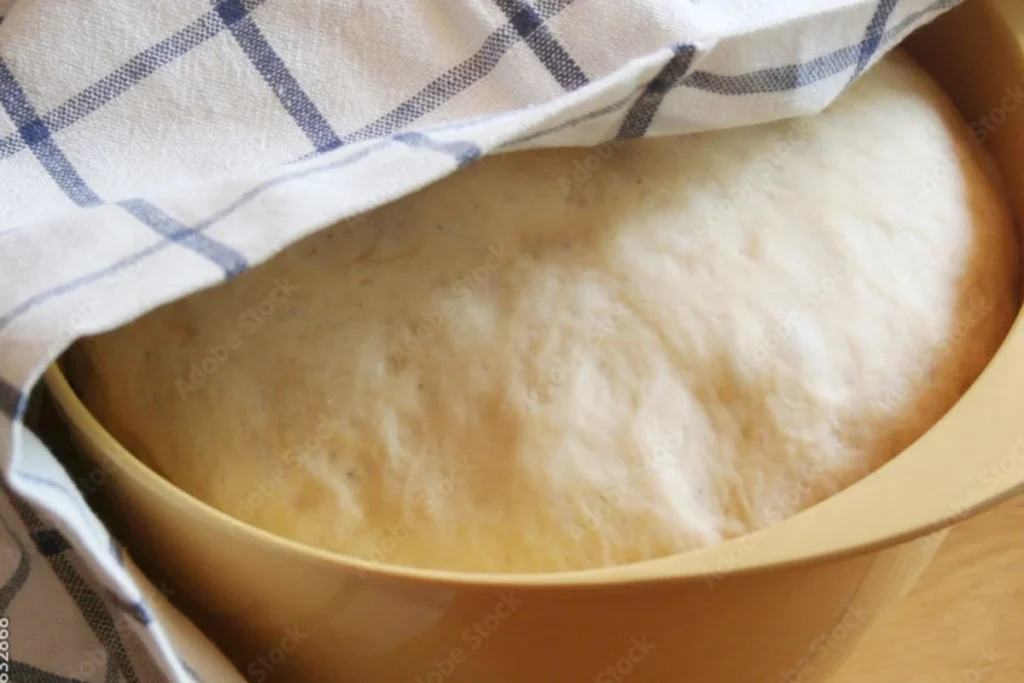
For a simple and effective alternative, grab a kitchen bowl. Choose a bowl similar in size to what you’d use for your bread. Put your shaped dough, seam side down, into the floured bowl. Cover the bowl with a damp kitchen cloth.
The damp cloth creates a moist environment, keeping the dough’s surface from drying out during the rising process. This method is especially useful for achieving a soft and tender crumb. When it’s time to bake, transfer the dough onto your baking surface, creating a well-risen loaf with a pleasing texture.
7. Perforated Baking Sheet
Turn your regular baking sheet into a versatile proofing surface. Make sure the sheet is well-floured to avoid sticking. Shape your dough and place it seam-side down directly on the perforated baking sheet.
The perforations allow air circulation, helping with consistent proofing. Cover the dough with a kitchen towel and let it rise. When it’s time to bake, transfer the dough, cloth, and all, onto your preheated baking surface for a convenient and visually appealing outcome.
8. DIY Parchment Paper Pouches
Create your proofing pouches using parchment paper for a creative solution. Cut parchment paper into rectangular shapes, fold them into pouches, and secure the seams with paper clips or kitchen twine. Put your shaped dough, seam side down, into the parchment pouch.
The pouch provides a structure for the dough to rise while maintaining a clean shape. Cover the pouch with a kitchen towel and let the magic happen. When it’s time to bake, carefully transfer the dough, pouch, and all, onto your baking surface.
What Cloth Should I Use in These Proofing Basket Alternatives?
Choosing the right fabric for your proofing basket alternatives is key to getting the best results in your bread-making journey. If you’re swapping out a regular banneton cloth, go for linen or cotton.
These materials give your dough a smooth surface to rise on and keep it from sticking. Make sure to generously flour the cloth to make releasing the dough easily and create a nice pattern on your loaf. If you’re covering bowls with a damp cloth, use a kitchen towel that absorbs well.
This helps create a humid environment, preventing the dough’s surface from drying out during proofing. The type of cloth you pick makes a big difference in the success of these alternative methods, affecting the texture, appearance, and overall quality of your freshly baked bread.
Benefits and Drawbacks of Each Proofing Basket Alternative
Each alternative method for proofing bread comes with its own set of benefits and drawbacks, offering bakers flexibility in choosing the approach that best suits their preferences and kitchen resources.
Bowl and Towel Method:
Benefits: The simplicity of this method is its greatest advantage. Most kitchens have suitable bowls and towels readily available. The towel helps create a warm and slightly humid environment, promoting ideal yeast activity and dough expansion. It’s an accessible choice for novice bakers.
Drawbacks: The dough may stick to the towel if not sufficiently floured, and the final loaf might lack the intricate patterns characteristic of traditional proofing baskets.
Lined Colander Technique:
Benefits: The colander provides excellent support, imparting a unique shape and texture to the dough. This method is budget-friendly and requires items commonly found in the kitchen.
Drawbacks: The resulting loaf may have a less defined pattern compared to traditional baskets, and there’s a risk of the dough sticking to the towel if not properly floured.
Glass Bowl with Plastic Wrap:
Benefits: This method creates a seal with the plastic wrap, retaining moisture and preventing the dough from drying out. It’s a simple and effective alternative that requires minimal equipment.
Drawbacks: Care must be taken when inverting the bowl to release the dough, and the loaf might lack the intricate patterns associated with traditional proofing baskets.
Silicone Molds:
Benefits: Silicone molds provide excellent support, shaping the dough uniformly. They are reusable and come in various shapes and sizes, offering versatility.
Drawbacks: The patterns on the final loaf may differ from those achieved with traditional baskets, and some bakers may find the uniform shape less appealing.
Banneton Cloth:
Benefits: Using a linen or cotton cloth as a substitute for a traditional banneton lining offers a smooth surface for the dough to rise against. It’s a simple and accessible solution that contributes to a visually appealing crust pattern.
Drawbacks: Proper flouring is essential to prevent sticking, and the cloth may not provide the same structural support as a traditional banneton.
Bowl Covered with Damp Cloth:
Benefits: The damp cloth creates a moist environment, preventing the dough from drying out during proofing. This method is straightforward, utilizing common kitchen items.
Drawbacks: There is a risk of the dough sticking to the cloth if not adequately floured, and the resulting loaf may lack the characteristic patterns of traditional proofing.
Perforated Baking Sheet:
Benefits: The perforations allow for consistent air circulation, aiding in uniform proofing. This method is suitable for those who prefer a more open crumb structure.
Drawbacks: The resulting loaf may lack the intricate patterns associated with traditional baskets, and the transfer of the dough to the oven requires care to maintain its shape.
DIY Parchment Paper Pouches:
Benefits: Parchment paper pouches provide structure for the dough, creating a distinct shape. They are a creative and cost-effective solution.
Drawbacks: Proper sealing of the pouch is crucial, and the final pattern on the loaf may differ from that achieved with traditional baskets.
Frequently Asked Questions (FAQS)
Are proofing baskets necessary?
Proofing baskets aren’t strictly necessary, but they help shape and support dough during fermentation. They enhance the final bread’s structure and aesthetics, creating a professional look.
Can I use parchment paper to line my proofing basket or bowl?
Yes, parchment paper is a suitable alternative for lining proofing baskets or bowls. It prevents sticking and simplifies the transfer of dough to the baking surface, ensuring a smooth process.
Can I proof sourdough in a plastic container?
Yes, you can proof sourdough in a plastic container. Make sure it’s food-grade and sufficiently spacious for the dough to rise. Plastic retains moisture, which can be advantageous in certain baking scenarios.
Can you make a DIY banneton?
Crafting a DIY banneton is feasible. Use a clean cloth or towel, line a bowl or basket, and dust it with flour. This makeshift banneton aids in shaping the dough, though results may vary compared to professional tools. Experimenting with different materials is encouraged for personalized outcomes.
Conclusion
Baking sourdough bread has turned into a kind of art, where people try out different methods to get that ideal loaf. One really important part of the process is letting the dough rise and develop its special flavor. Usually, proofing baskets, also called bannetons, have been the preferred choice for shaping and proofing sourdough.
But there are plenty of other options that can give you similar or even better results. In this blog post, we’ll check out eight alternatives to proofing baskets that can take your sourdough bread baking to the next level.
Lindsey Mackenzie
About me
Hi there! I’m Lindsey Mackenzie, the founder of Bake Smartly. Baking has been my passion since childhood, growing up in my father’s bakery. With Bake Smartly, I’m excited to share my love for all things sweet and savory. Join me on this delicious journey as we whip up scrumptious treats and sprinkle joy into every bite!

