The Ultimate Guide to Tell If My Sourdough Starter Is Dead or Alive
In the world of baking, sourdough is like an artist’s masterpiece. It takes time, patience, and just the right conditions to create the perfect loaf. The key player in this whole thing is the sourdough starter – it’s like a mix of wild yeast and bacteria that gives sourdough its special taste and feel.
But keeping a sourdough starter going can be a bit tricky, and sometimes you might if your sourdough starter is still alive and thriving.
In this ultimate guide, we’ll check out the main signs to figure out if your sourdough starter is dead and how to bring it back to life if necessary..
Table of Contents
Toggle5 Signs Your Sourdough Starter Might Be Dead
Creating and maintaining a lively sourdough starter is an art, and sometimes, despite our best efforts, starters can face setbacks. It’s crucial to recognize the signs of a struggling or dead sourdough starter to take corrective action promptly.
Here are five key indicators that your sourdough starter may be on the verge of demise:
1. Lack of Bubbling Activity
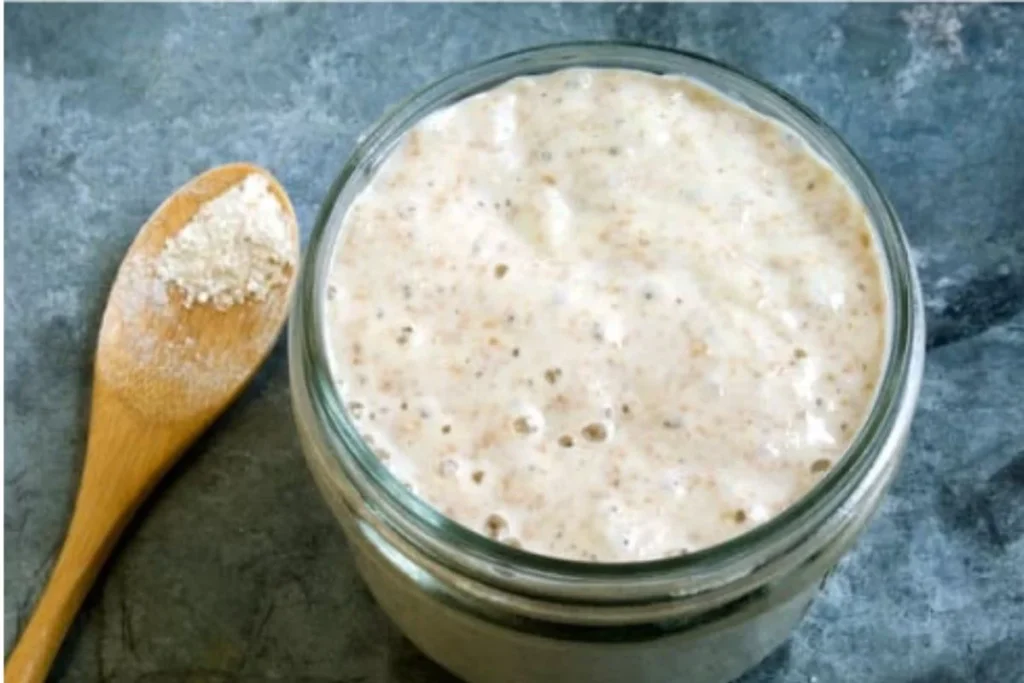
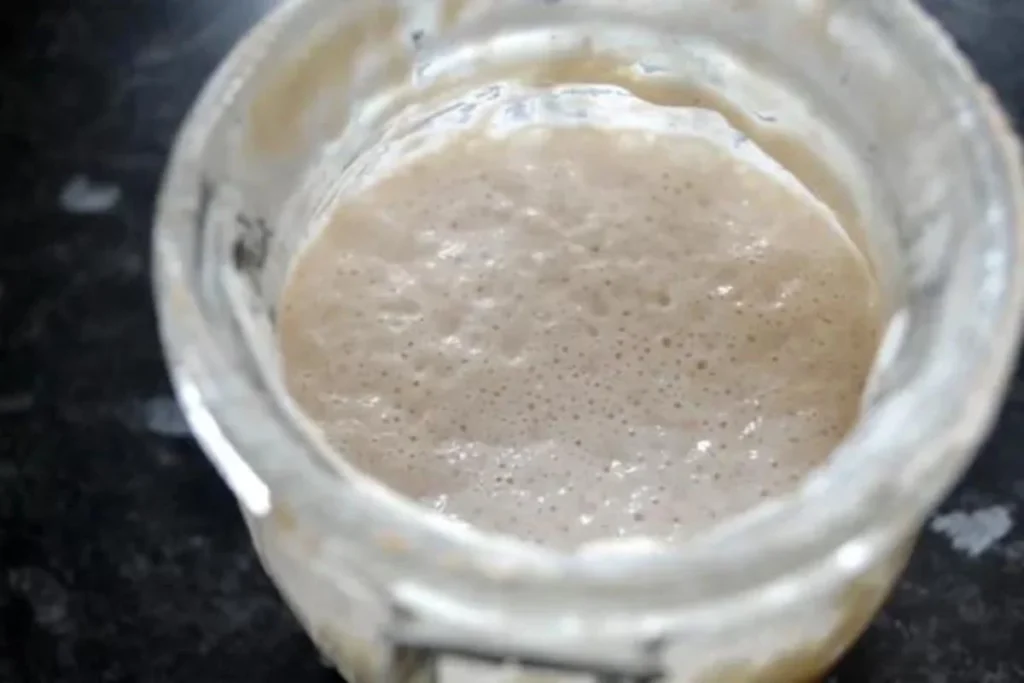
One of the most apparent signs of a healthy sourdough starter is the presence of bubbles. When the wild yeast and lactic acid bacteria in the starter feed on flour and water, they produce carbon dioxide, leading to visible bubbles.
If you notice a stark absence of bubbles or a significant reduction in bubbling activity during the fermentation process, it’s a clear indication that the microorganisms within your starter might be inactive or weakened.
2. Absence of Rise
A robust sourdough starter should exhibit a noticeable rise during the fermentation period, indicating the expansion of gases produced by the microbial activity.
If your starter consistently fails to rise or exhibits a minimal increase in volume after feedings, it suggests a lack of yeast and bacteria vitality. The rise is a tangible sign that the fermentation process is occurring successfully, and its absence may signify a struggling or dormant starter.
3. Unpleasant Odor
A sourdough starter typically emits a pleasantly tangy and fermented aroma. However, if you detect an unpleasant or off-putting smell resembling acetone, spoiled food, or a putrid odor, it could be an indication that harmful bacteria have overtaken the beneficial microorganisms.
An undesirable smell is a strong signal that your starter may be compromised and in need of revival or, in extreme cases, replacement.
4. Mold Growth
While mold growth is less common in a healthy sourdough starter due to its acidic environment, neglect or contamination can lead to mold issues. If you observe any fuzzy or discolored patches on the surface of your starter, it’s a clear sign of mold infestation.
Mold can outcompete the yeast and bacteria you want to flourish, leading to an unbalanced and potentially harmful microbial community. In such cases, it’s advisable to discard the starter and start anew to ensure a fresh and uncontaminated beginning.
5. Persistent Hooch Formation
Hooch is a layer of liquid that can form on the top of a sourdough starter when it has been left unfed for an extended period. While a thin layer of hooch is normal and can be stirred back into the starter during regular feedings, persistent and dark-colored hooch can be an alarming sign.
This excessive formation suggests that the microbial balance within the starter is skewed, with the alcohol content surpassing the capacity of the yeast to consume it. This imbalance can hinder the fermentation process, leading to a dormant or weakened sourdough starter.

How to Revive a Sourdough Starter That Appears Inactive in 4 Easy Methods
Sourdough baking enthusiasts often encounter the disappointment of an apparently inactive sourdough starter. Whether you’re a seasoned baker or a novice, reviving a dormant sourdough starter can be a simple yet crucial process to ensure your bread rises to perfection.
In this section, we will explore four easy and effective methods to revive a seemingly lifeless sourdough starter, helping you breathe new life into your baking adventures.
Method 1: Feeding and Patience
The first and most fundamental method for reviving a dormant sourdough starter is through regular feeding and patience. Begin by discarding a portion of your starter, leaving only a small amount in the container. Replace the discarded portion with equal parts flour and water. Mix thoroughly, cover loosely, and let it sit at room temperature.
Repeat this process every 12 hours for a few days, observing the gradual signs of activity such as bubbles and a tangy aroma. The key is consistency and patience, as it may take several feedings before the starter fully rejuvenates.
Method 2: Warm Environment Boost
Sometimes, a sourdough starter may become dormant due to cooler temperatures. In such cases, providing a warm environment can jumpstart its activity. Place the starter in a slightly warmer area of your kitchen or use a warm water bath to create a cozy atmosphere for the microorganisms to thrive.
Combine this method with regular feedings to encourage the revival process. Keep a close eye on the starter’s progress, adjusting the warmth as needed until you witness the desired signs of life.
Method 3: Pineapple Juice Kickstart
For a more accelerated revival, consider using pineapple juice in your feedings. The acidity in pineapple juice helps control the pH level of the starter, creating a favorable environment for beneficial bacteria.
Begin by discarding the majority of your dormant starter and replacing it with a mixture of equal parts flour and pineapple juice. Repeat this process every 12 hours, and within a couple of days, you should notice increased activity. Once your starter shows consistent signs of life, transition back to regular feedings with water and flour.
Method 4: Whole Grain Flour Transformation
Reviving a sourdough starter with whole grain flour can introduce additional nutrients, prompting a quicker revival. Replace a portion of your dormant starter with whole grain flour and water, maintaining a 1:1:1 ratio.
Whole grain flour provides essential nutrients and a richer environment for microbial activity. After a few feedings, you should observe increased bubbles and a more robust aroma. Once your starter is back on track, you can transition back to your usual flour type.
Preventive Measures for Sourdough Starter Maintenance
To avoid the stress of reviving a dead sourdough starter, it’s crucial to implement preventive measures for maintenance. Follow these tips to keep your sourdough starter in optimal condition:
- Regular Feedings: Establish a feeding routine for your sourdough starter to ensure it receives fresh flour and water consistently. Depending on your baking frequency, aim for daily or bi-daily feedings.
- Proper Storage: If you anticipate a break from baking, consider storing your sourdough starter in the refrigerator. This slows down the fermentation process and allows the starter to survive without regular attention. Remember to bring it back to room temperature and resume regular feedings before baking.
- Use Quality Ingredients: The quality of your sourdough starter depends on the ingredients you use. Opt for high-quality flours and filtered water to provide the best environment for the yeast and bacteria.
- Cleanliness: Maintain a clean environment for your sourdough starter. Use sanitized containers and utensils for feedings to prevent contamination. A clean environment reduces the risk of harmful bacteria or mold taking hold.
- Experiment with Flour Types: While all-purpose flour is commonly used for sourdough starters, incorporating whole grain flours can add extra nutrients and improve the overall health of the starter. Experiment with different flour types to see what works best for your preferences and baking goals.

What Can I Do With A Dead Sourdough Starter?
If you’ve got a seemingly lifeless sourdough starter, don’t toss it out entirely. Instead, get creative and repurpose it in ways that not only cut down on waste but also bring unique flavors and textures to your cooking.
- Pancakes and Waffles: Turn that sleepy sourdough starter into tasty pancakes or waffles. The starter’s acidity gives a subtle tang to these breakfast treats, adding a unique flavor. Just mix the inactive starter with flour, eggs, baking soda, and your preferred sweetener for a quick and flavorful morning treat.
- Flatbreads and Crackers: Make homemade flatbreads or crackers with your inactive sourdough starter. The leftover flavors from the starter can enhance the taste of these savory snacks. Mix the dormant starter with olive oil, salt, and more flour to create a versatile dough. Roll it out thin, bake, and enjoy your crispy flatbreads or crackers.
- Flavorful Bread Additions: Even if your sourdough starter isn’t lively enough for bread baking, it can still boost the flavor and texture of other bread recipes. Add your dormant starter to artisanal bread recipes for a unique depth of taste and a chewy texture. Try it out with different types of bread to discover exciting combinations.
- Flavorful Marinades and Sauces: Give your marinades and sauces a kick with the distinct taste of sourdough. The inactive starter, mixed with herbs, spices, and other ingredients, can create flavorful bases for marinades or sauces. The natural tang of the sourdough adds complexity to your dishes, making them stand out.
- Baking Project for Kids: Get kids involved in a fun and educational baking project using the dormant starter. The hands-on experience of mixing, shaping, and baking can be a delightful way to introduce them to the world of sourdough and baking.
How Long Can A Starter Survive Unfed?
A sourdough starter can stay alive without food for different lengths of time, depending on things like the room temperature and the overall health of the starter. Usually, a well-kept starter can go without feeding for around 1 to 2 weeks in cooler conditions. In warmer places, it might need more frequent attention.
But it’s important to know that the starter’s strength decreases over time without regular feedings. Going a long time without refreshing it can make it less active and give it weird flavors. To keep your sourdough starter healthy and strong, it’s a good idea to stick to a regular feeding schedule, usually every 24 to 48 hours. The exact timing depends on how often you bake and the conditions in your kitchen.
Will Tap Water Kill My Sourdough Starter?
It’s usually fine to use tap water for your sourdough starter, but there’s something to keep in mind. Some places add chlorine or chloramine to the tap water to make it safe, and that can slow down the good microorganisms in your starter.
To fix this, just let the tap water sit out for a few hours or overnight to let the chlorine go away. Another option is to use filtered or dechlorinated water for your sourdough starter. Making sure your starter has the right conditions for natural fermentation is super important, and the quality of your water matters.
Try out different water sources or treatments to see what works best for your starter, and you’ll keep a healthy community of microbes for the best sourdough baking results.
Conclusion
A sourdough starter is the heart of sourdough baking, and its well-being is crucial for achieving delicious and consistent results. By understanding the signs of a dead sourdough starter and taking proactive measures for maintenance, you can ensure that your starter remains a lively and productive part of your kitchen.
If your sourdough starter does encounter challenges, don’t be discouraged – with patience and care, you can revive it and continue enjoying the art of sourdough baking. Happy baking!
Lindsey Mackenzie
About me
Hi there! I’m Lindsey Mackenzie, the founder of Bake Smartly. Baking has been my passion since childhood, growing up in my father’s bakery. With Bake Smartly, I’m excited to share my love for all things sweet and savory. Join me on this delicious journey as we whip up scrumptious treats and sprinkle joy into every bite!


