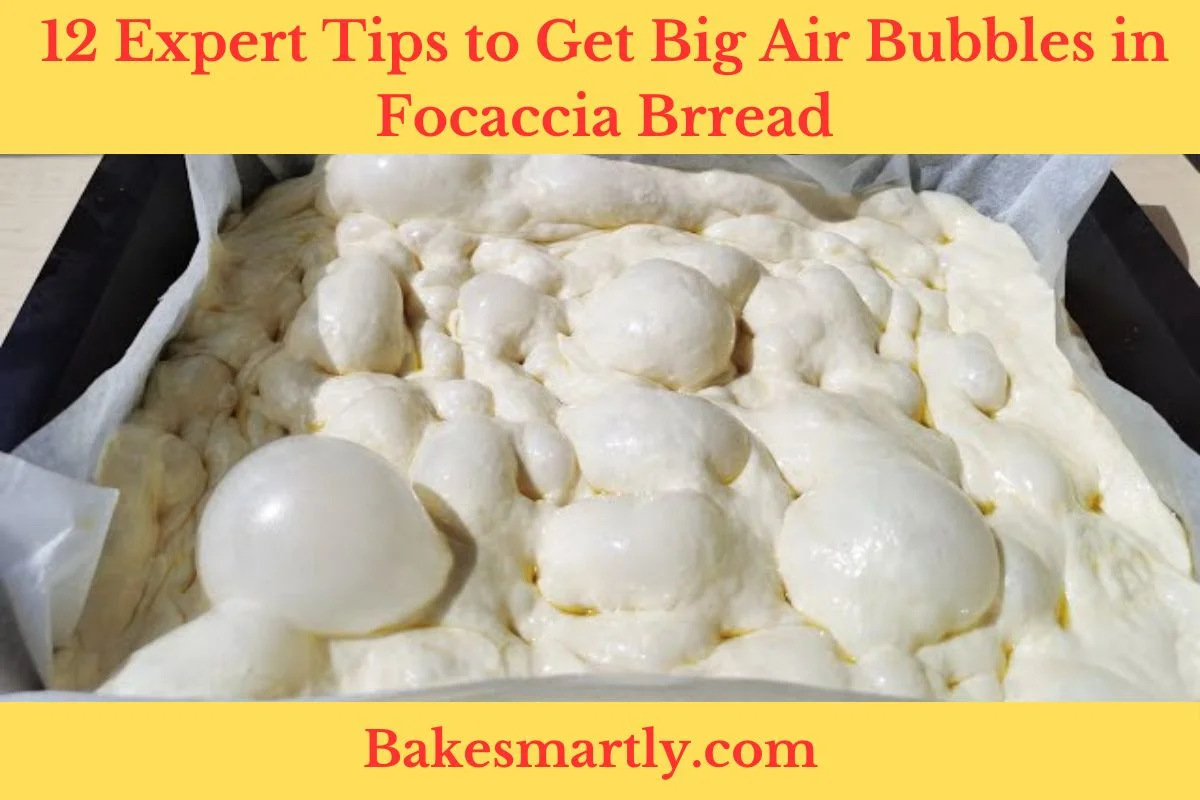
12 Expert Tips to Get Big Air Bubbles in Focaccia
Focaccia is a must-have in Italian cooking, known for its light texture and amazing smell. The key to a great focaccia is those big, uneven air pockets inside that give it a unique feel and taste.
Achieving those big air bubbles can be a bit challenging, but fear not! In this blog post, we’ll go over 12 expert tips to help you step up your focaccia game and make bread that’s not only eye-catching but delicious.
Table of Contents
ToggleWhy Does My Focaccia Not Have Big Bubbles?
The presence of big bubbles in focaccia is typically associated with the fermentation and rising process of the dough. Here are some common reasons why your focaccia might not have big bubbles:
- Underproofing: The dough may not have been given enough time to rise and ferment properly. Ensure that you allow the dough to rise for a sufficient amount of time. This allows the yeast to produce carbon dioxide, creating the desired bubbles.
- Overmixing: If the dough is overmixed, it can deflate the carbon dioxide bubbles that have formed during the rising process. Mix the dough until just combined to avoid overworking it.
- Improper kneading: Kneading the dough helps develop gluten, which contributes to the structure of the bread. However, excessive kneading can lead to a dense texture. Find a balance in kneading to achieve the desired crumb structure.
- Incorrect yeast amount: Using too much or too little yeast can affect the fermentation process. Follow the recipe closely, and ensure that your yeast is fresh and active.
- Inconsistent dough thickness: If the dough is not evenly rolled out, it can result in uneven rising and baking, leading to an inconsistent crumb structure.
- Dough hydration: Focaccia dough should be relatively wet and sticky. If the dough is too dry, it may not trap enough carbon dioxide during fermentation, resulting in a less airy texture.
- Baking temperature: Ensure that your oven is preheated adequately, and the temperature is consistent throughout the baking process. A high temperature helps the yeast produce gas quickly, leading to larger bubbles.
- Handling the dough too much: Excessive handling of the dough, especially during shaping, can deflate the bubbles. Handle the dough gently to preserve the structure.
- Using cold ingredients: Cold ingredients can slow down the fermentation process. Make sure your ingredients, especially water, are at room temperature.
- Quality of flour: The type of flour you use can impact the texture of the focaccia. Bread flour, with its higher protein content, is often recommended for achieving a light and airy crumb.
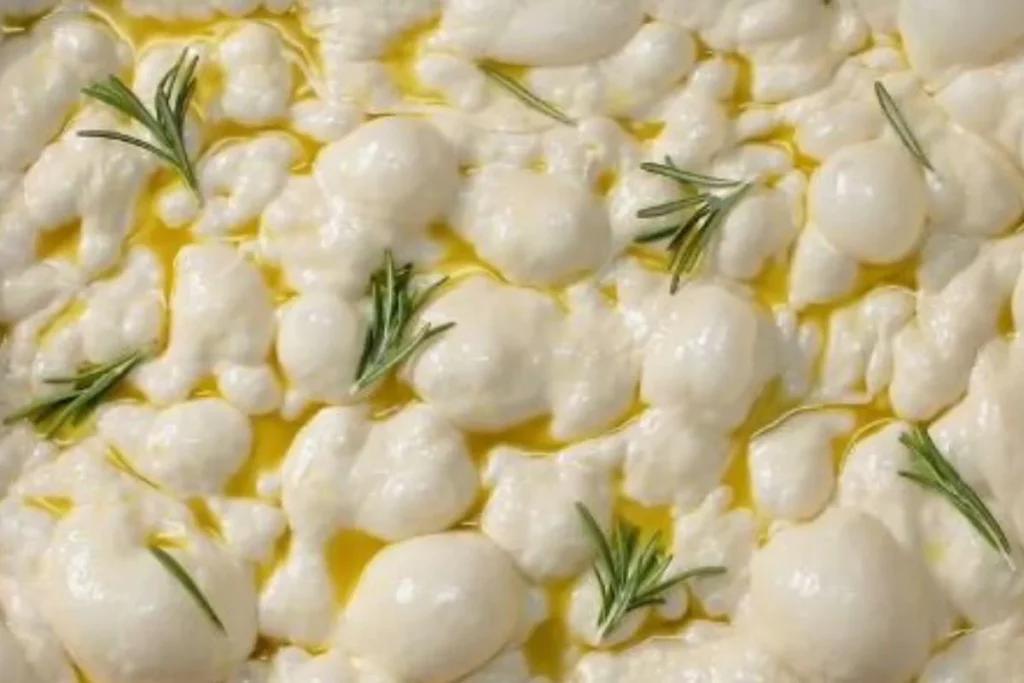
How to Get Big Air Bubbles in Focaccia | 12 Expert Tips
Now that you know why your focaccia isn’t bubbly, Here are 12 expert tips to help you get those desired airy pockets in your focaccia:
Tip 1: Moist Dough
The key to amazing focaccia is the dough itself. To get those big air bubbles, you need a wet dough – we’re talking around 75-80% water. This makes the dough sticky and messy to work with, but it’s worth it for that perfect chewy texture and those awesome air pockets.
Tip 2: Slow Rising
When it comes to baking great focaccia, patience is key. Letting your dough rise slowly, whether you’re using regular yeast or sourdough, lets the yeast do its thing gradually.
Giving it more time, especially in the fridge, makes the dough taste even better and helps those bubbles grow. The slow rise makes the dough light and airy.
Tip 3: Handle with Care
When you’re shaping your focaccia, be gentle with the dough. Don’t squish out all those bubbles you worked so hard for during fermentation.
Stretch and fold the dough carefully to build up its structure without ruining it. This gentle touch helps create those big, uneven air pockets that make focaccia special.

Tip 4: Press with Fingers
Before baking, use your fingers to make deep dimples all over the dough. It’s not just for looks – those dimples help the heat spread evenly while baking. This means your focaccia rises uniformly and gets those big air bubbles.
Plus, it gives your bread that rustic, homemade look.
Tip 5: Olive Oil Bath
Olive oil isn’t just for flavor – it’s a big deal for the texture too. Before baking, give your focaccia a good coating of quality olive oil. This adds a rich, savory taste and helps the crust get crispy and golden.
The oil also keeps moisture inside the dough, which helps create steam during baking and those lovely air bubbles.
Tip 6: Let it Rest
Once you’ve shaped your focaccia, let it rise one last time at room temperature. This gives the yeast more time to work and lets the dough relax and expand.
The gentle warmth helps it rise steadily, making those bubbles you want. Don’t rush this step – it’s crucial for a great final result.
Tip 7: Choose Good Flour
The type of flour you use can affect how your focaccia turns out. Go for a high-quality bread flour with more protein, usually about 12-14%.
Higher protein helps the gluten develop better, which is important for the dough’s structure and getting those nice air bubbles. Using top-notch flour sets you up for a focaccia that not only looks great but also tastes and feels amazing.
Tip 8: Heat Your Oven and Pan
Getting your oven hot enough is key to baking success. Before you put your focaccia in, make sure both the oven and your baking surface (like a stone or baking sheet) are fully preheated.
A hot oven gets the yeast working quickly and helps the bread rise well, giving you those big air bubbles. This step is essential for getting an even rise and a crispy outside, taking your focaccia to the next level.

Tip 9: Add Steam
Adding steam to the oven at the start of baking is a trick used by many artisan bakers to get a great crust and lots of air bubbles. The steam keeps the dough’s surface moist, letting it expand fully before the crust forms.
You can do this by putting a pan of hot water in the oven or spraying the dough and oven walls with a spray bottle. Steam creates the perfect environment for your focaccia to rise well and get that golden, crispy crust.
Tip 10: Make Good Cuts
Making deliberate cuts in the dough before baking, called scoring, not only makes your focaccia look nice but also helps air circulate during baking. Use a sharp knife or razor blade to make confident, deep slashes in your shaped dough.
These cuts guide how the dough expands, preventing it from tearing randomly and ensuring an even rise. Good scoring is an art that makes your focaccia look great and helps those air bubbles form just right.
Tip 11: Try Sourdough
To boost the flavor of your focaccia and still get those impressive air bubbles, think about using a sourdough starter in your recipe. Sourdough starter adds natural yeast and bacteria, giving your bread a more complex taste.
The longer fermentation time with sourdough also helps make the crumb light and airy. Experimenting with sourdough can add depth and character to your focaccia, making it stand out in both looks and taste.
Tip 12: Use the Right Pan
The pan you bake your focaccia in makes a big difference in how it turns out. Pick a large, rimmed baking sheet to give the dough plenty of space to spread out.
The rectangular shape helps the dough stretch and rise, giving you a focaccia with good height and a light, airy texture. Choosing the right pan size and shape is a simple but important step to make sure your focaccia comes out perfectly.
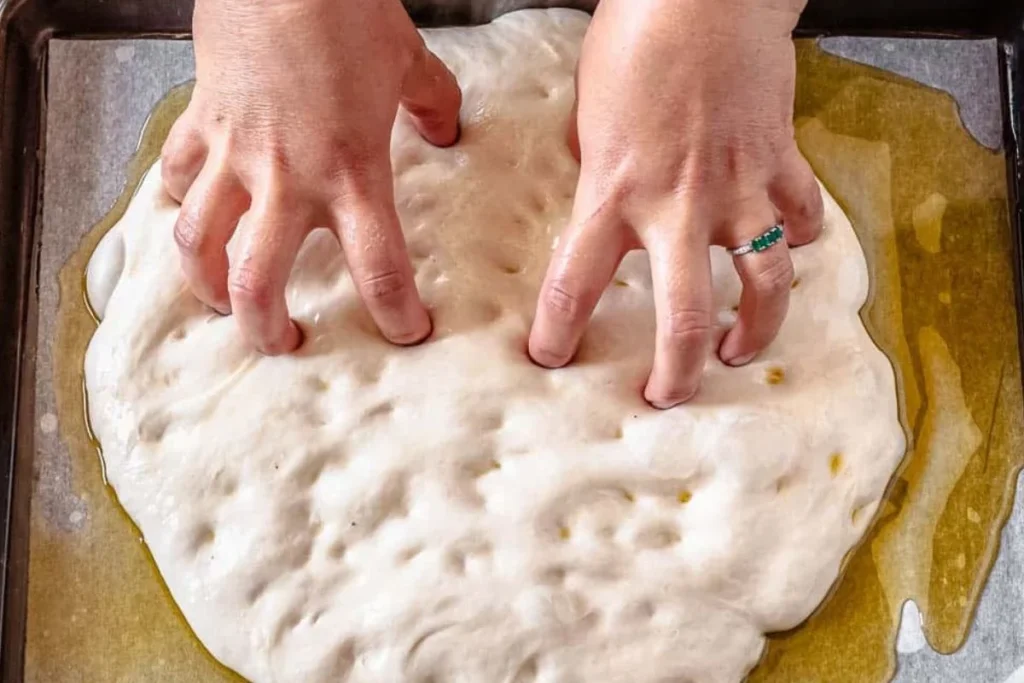
What Happens if You Don’t Dimple Focaccia?
Dimpling is a crucial step in the focaccia-making process, contributing not only to its distinctive appearance but also to its texture and overall eating experience.
If you choose to skip dimpling your focaccia, several consequences may impact the final result:
1. Uneven Rising
Dimpling helps distribute the yeast-produced gases evenly throughout the dough during the final proofing stage. By creating those characteristic dimples on the surface, you allow the dough to rise more uniformly.
Without dimpling, the focaccia might rise unevenly, resulting in areas that are too thick or too thin.
2. Inconsistent Texture
The purpose of dimpling is not only aesthetic but also functional. Those dimples act as pockets for the olive oil to collect, creating a crispy, golden crust. Additionally, the depressions in the dough contribute to the focaccia’s trademark airy and light texture.
Without dimpling, the texture may be more compact and lacking the desirable combination of a crisp exterior and a soft, open crumb.
3. Limited Flavor Absorption
Dimpling facilitates the absorption of olive oil and other toppings into the dough, enhancing the overall flavor profile of the focaccia. When you skip this step, the toppings may sit more on the surface, providing a less integrated flavor experience.
Dimpled focaccia allows the oil and seasonings to permeate the bread, resulting in a more flavorful bite.
4. Reduced Visual Appeal
The dimples on the surface of the focaccia are not just for show; they serve a purpose in creating an aesthetically pleasing bread. The irregular pattern adds visual interest and character to the finished product.
Without dimples, your focaccia may lack the rustic charm and authenticity that make it a visually appealing dish.
5. Potential Overproofing Issues
Dimpling also helps assess the proofing progress. If you skip this step, it may be more challenging to gauge whether the dough has been proofed adequately. Overproofing can lead to collapsed air pockets, resulting in a denser crumb and a less satisfying texture.
Dimpling provides an opportunity to check the dough’s resilience and adjust the proofing time accordingly.
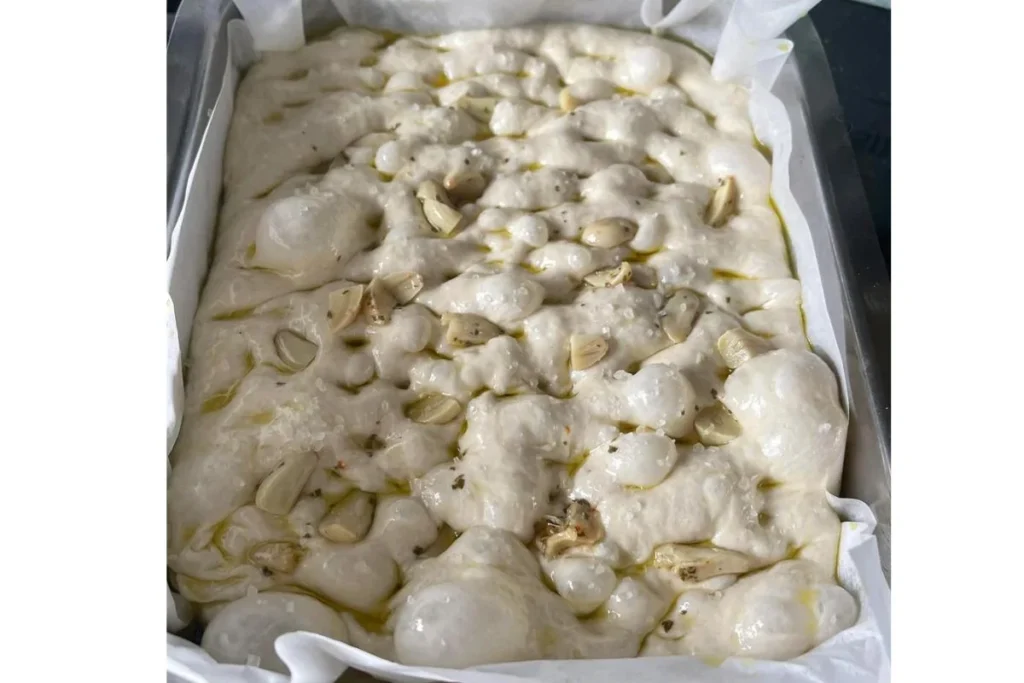
Should You Pop Focaccia Bubbles?
Deciding whether to pop the bubbles in focaccia is totally up to you and what you want your bread to be like in the end.
Some folks like the mix of textures, with the crispy outside and soft inside, and they don’t want to mess with those bubbles. Plus, they think the bubbles make the bread look nice.
But then, some bakers want their focaccia to be more even all the way through. They’ll pop those bubbles to get a denser texture. Doing that makes the surface smoother and the inside more consistent.
At the end of the day, it’s all about what you like. If you dig the rustic, uneven feel with those airy pockets, keep the bubbles. If you prefer a smoother, more consistent texture, go ahead and pop them. It’s all about how you want your focaccia to taste and feel when you eat it.
Final Thoughts
Taking your focaccia to the next level with big air bubbles is a fun journey that mixes science, art, and a bit of cooking intuition. By picking the right ingredients, getting fermentation just right, and using top-notch techniques, you can make a focaccia that looks amazing and tastes even better.
Try new things, enjoy learning along the way, and feel proud when you bake a truly outstanding bread that stands out from the crowd. Have fun baking!
Lindsey Mackenzie
About me
Hi there! I’m Lindsey Mackenzie, the founder of Bake Smartly. Baking has been my passion since childhood, growing up in my father’s bakery. With Bake Smartly, I’m excited to share my love for all things sweet and savory. Join me on this delicious journey as we whip up scrumptious treats and sprinkle joy into every bite!

