How To Dehydrate and Rehydrate My Sourdough Starter | Complete Guide
Sourdough enthusiasts understand the joy of having a robust starter on hand. However, life’s unpredictable nature might leave you wondering, “How can I ensure my sourdough starter survives unforeseen circumstances?” The answer lies in a simple yet effective technique—dehydrating your sourdough starter.
In this comprehensive guide, we dive into the intricate details, arming you with the knowledge and skills needed to master the preservation method of dehydrating and later rehydrating your sourdough starter.
Why Dehydrate Your Sourdough Starter?
Dehydrating your sourdough starter is a game-changer in baking, bringing loads of benefits that can enhance your cooking experience. This method of preserving your starter isn’t just a trendy thing to do; it’s a game-changer for both new and experienced bakers.
Let’s explore why dehydrating your sourdough starter is a good idea.
Longer Shelf Life
Dehydrating your sourdough starter significantly increases how long it stays good. This method lets you keep the vitality of your starter for a long time, giving you the flexibility to bake whenever you want.
Whether life gets busy or you’re taking a break from baking, a dehydrated starter ensures you have a reliable base whenever you feel like baking.
Easy Storage
The dehydrated sourdough starter is compact and easy to store. Unlike a live starter that needs regular feeding and attention, a dehydrated one can be kept in a small container, taking up minimal space in your kitchen.
This not only simplifies storage but also helps keep your baking area organized.
Ready for Anything
Imagine having your sourdough starter ready for spontaneous baking or last-minute get-togethers. Dehydrating your starter lets you be impulsive in the kitchen.
Whether you’re an experienced baker trying new recipes or a beginner taking your first steps, a dehydrated starter ensures you’re always ready for your baking adventures.
Share the Joy of Sourdough
Dehydrating your sourdough starter opens up opportunities to share the joy of baking. It becomes a portable gift, allowing you to spread the love of sourdough with friends and family.
By giving others a dehydrated starter, you’re not just sharing a baking essential; you’re passing on the experience and tradition of sourdough craftsmanship.
How Old Should Your Starter Be When You Dry It?
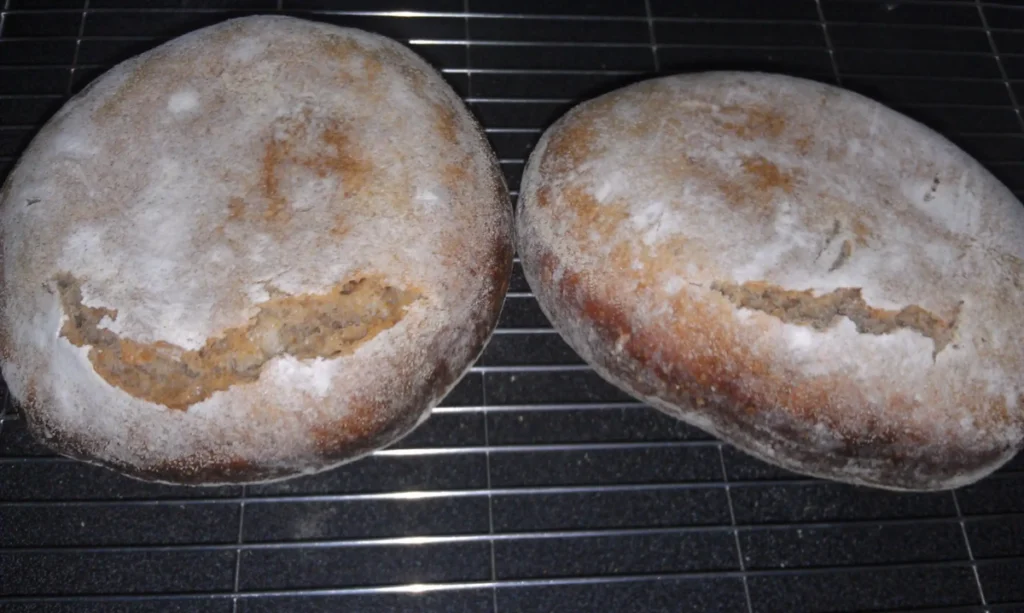
The best time to dehydrate your sourdough starter is when it’s going strong. You want it to be mature and active, showing lots of bubbling action. Usually, this happens when your starter has been around for at least 3 months old.
At this point, the mix of microorganisms is solid, making it more likely for dehydration and later rehydration to work well. A fully developed starter adds to the flavor and rising power, which are key for getting the results you want in your sourdough goodies.
Can You Dehydrate Sourdough Starter Without a Dehydrator? | 4 Easy Methods
Absolutely, dehydrating your sourdough starter is achievable even without a specialized dehydrator. While a dehydrator offers precision and control, various alternative methods cater to those without this specific equipment.
Here’s a guide on how to dehydrate your sourdough starter using accessible tools:
Air Drying
One straightforward approach involves good old-fashioned air drying. After refreshing your sourdough starter, spread a thin layer on a parchment-lined baking sheet. Allow it to sit at room temperature, ensuring proper ventilation.
Stir occasionally to facilitate even drying. In a day or two, you’ll notice a brittle, flaky texture – a sign that your sourdough starter is successfully dehydrated.
Oven Method
For a quicker alternative, turn on your oven. Begin by preheating it to its lowest setting, typically around 150°F (65°C). Once preheated, turn the oven off and place your starter on a parchment-lined tray inside.
Leave the oven door slightly ajar to allow moisture to escape. Regularly check the progress until your starter achieves the desired dehydrated consistency.
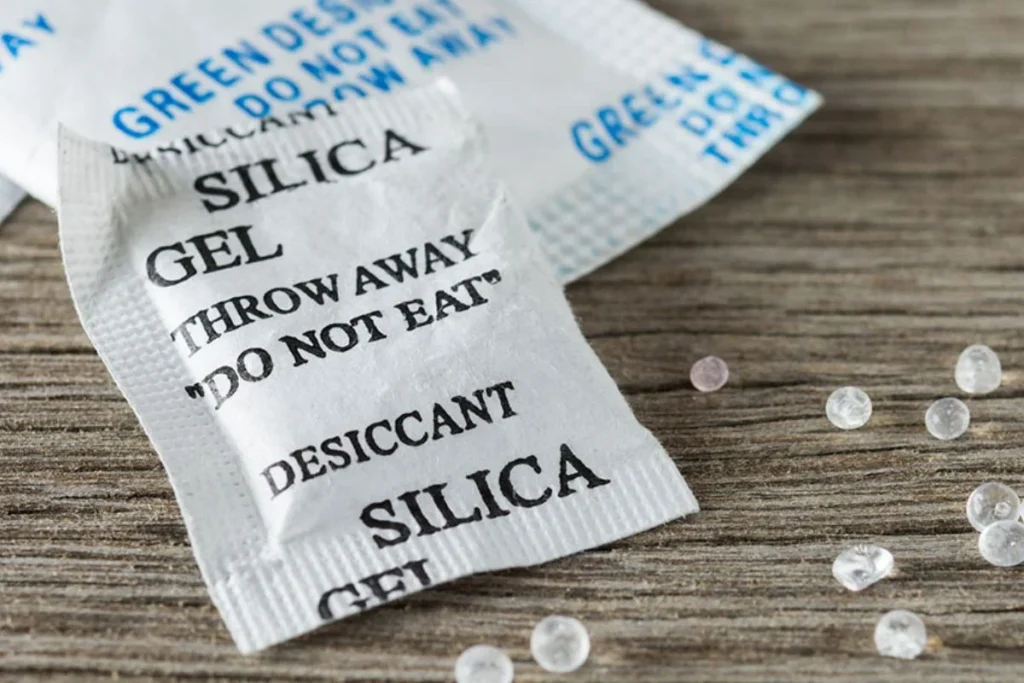
Desiccant Packs
Another ingenious method involves desiccant packs, the moisture-absorbing sachets often found in food packaging. Place your refreshed starter in a container with these packs, ensuring they do not come in direct contact.
Seal the container, and let the desiccant packs work their magic over a few days.
Sun Drying
If you’re blessed with sunny weather, consider sun drying. Spread your sourdough starter on a tray or sheet and place it in direct sunlight. This method requires patience, as it may take a few days, but the sun’s natural warmth will gradually dehydrate your starter.
Step-by-Step Guide to Dehydrating Sourdough Starter
Dehydrating your sourdough starter is a simple yet crucial process that enhances the longevity and versatility of this essential baking component.
Follow this detailed, step-by-step guide to start preserving your sourdough starter by dehydrating it.

- Preparation: Begin by ensuring your sourdough starter is healthy and active. A vibrant starter ensures a successful dehydration process. If your starter hasn’t been fed recently, refresh it with a mixture of flour and water, allowing it to reach its peak activity.
- Gathering Supplies: Collect the necessary tools and materials for the dehydration process. You’ll need a baking sheet, parchment paper, and a spatula. Additionally, prepare a fine-mesh sieve or coffee filter to facilitate the drying process.
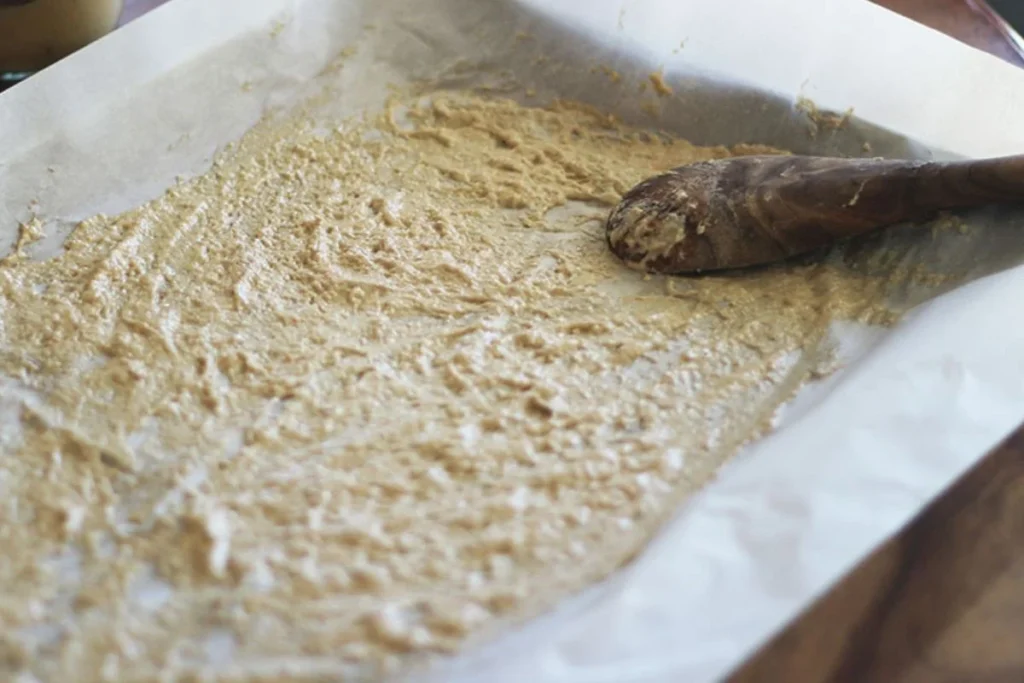
- Spreading the Starter: Take a small amount of your active sourdough starter and spread it evenly on a parchment paper-lined baking sheet. Aim for a thin, uniform layer to ensure consistent dehydration.
- Air Drying: Allow the spread starter to air dry for approximately 24 hours. This initial stage sets the foundation for the dehydration process. The starter will develop a slightly crispy texture on the surface.
- Flipping and Breaking: After the initial air-drying period, carefully flip the dehydrated layer using a spatula. Break the now partially dehydrated sheet into smaller pieces. This step facilitates thorough drying and guarantees uniform results.
- Extended Dehydration: Continue the dehydration process by placing the broken pieces back on the baking sheet. Allow them to dehydrate for an additional 24 to 48 hours, depending on your environment’s humidity levels. The goal is a fully dehydrated, crisp texture.
- Testing for Dryness: To ensure your sourdough starter is adequately dehydrated, conduct a simple test. Break a piece and check for any signs of moisture. A properly dehydrated starter should snap easily, indicating a lack of moisture.
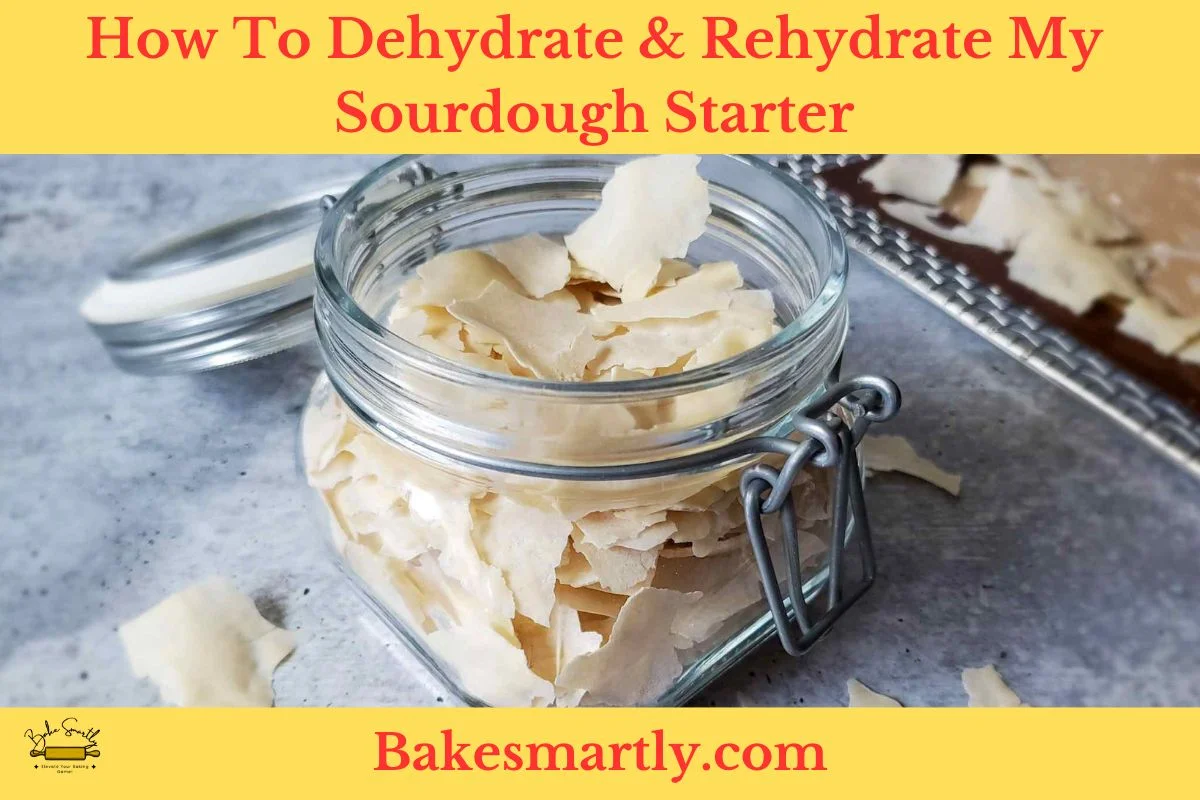
- Storage: Once fully dehydrated, store the crispy bits in an airtight container. Keep it in a cool, dry place away from direct sunlight. Your dehydrated sourdough starter is now ready for extended storage and future use.

How to Store Dehydrated Sourdough Starter
Storing your dehydrated sourdough starter is a crucial step in ensuring its longevity and preserving its distinct characteristics. Follow these simple yet effective guidelines to maintain the quality of your dehydrated starter.
- Airtight Containers: Opt for airtight containers to shield your dehydrated sourdough starter from moisture and contaminants. Mason jars or vacuum-sealed bags are excellent choices, as they create a protective barrier, preventing any potential degradation.
- Cool, Dark Place: Store your airtight container in a cool, dark place to maintain the integrity of the dehydrated starter. Exposure to sunlight and heat can compromise its quality over time, so a pantry or cupboard is an ideal storage spot.
- Labeling: Clearly label your container with the date of dehydration and any specific details about the type of flour used. This ensures you can track the age of your starter and make informed decisions when it comes time to rehydrate and use it in your baking endeavors.
- Regular Checks: Periodically check on your dehydrated sourdough starter to ensure there are no signs of moisture or spoilage. If any issues arise, it’s crucial to address them promptly to maintain the starter’s viability.
How Long Will Dehydrated Sourdough Starter Last?
The longevity of a dehydrated sourdough starter depends on various factors, but when stored correctly, it can last for an impressive duration. Typically, if stored in airtight containers in a cool, dark place, dehydrated sourdough starter can maintain its quality for up to a year or even longer.
The absence of moisture prevents the growth of unwanted microorganisms, preserving the starter’s integrity. However, it’s essential to periodically check for signs of degradation, such as changes in color or unusual odors.
Humidity levels in your storage environment also play a role; lower humidity tends to prolong the shelf life. By adhering to proper storage practices, you ensure that your dehydrated sourdough starter remains a reliable resource whenever you’re ready to revive it.
How to Rehydrate Dehydrated Sourdough Starter | Step-by-Step
Dehydrating your sourdough starter is a fantastic way to extend its shelf life and ensure you always have a reliable leavening agent at your fingertips. However, the process doesn’t end with dehydration; rehydration is the key to bringing your starter back to life.
In this section, we’ll guide you through the step-by-step process of rehydrating your dehydrated sourdough starter.

- Step 1: Gather Your Materials: Before you embark on the rehydration journey, make sure you have all the necessary materials on hand. You’ll need your dehydrated sourdough starter, a clean and sterile jar, lukewarm water, and high-quality flour. Choosing the right flour is crucial, as it directly impacts the health and vigor of your revived starter.
- Step 2: Measure and Combine: In your sterile jar, measure out the desired amount of dehydrated sourdough starter. The amount will depend on your recipe requirements, but a general rule of thumb is around one to two tablespoons. Add an equal amount of flour to the jar, ensuring a balanced ratio for optimal rehydration.
- Step 3: Add Lukewarm Water: Gradually add lukewarm water to the mixture, stirring continuously to avoid lumps. The water should be at a temperature between 90°F to 100°F (32°C to 38°C). This warm environment encourages the activation of the yeast in the starter.
- Step 4: Stir and Rest: Once the water is incorporated, stir the mixture thoroughly to create a smooth batter. Allow the mixture to rest for a few minutes to kickstart the rehydration process. During this time, the yeast in the dehydrated starter begins to absorb water and reactivate.
- Step 5: Feed Your Starter: After the initial rest, it’s time to feed your starter. Add a portion of flour and water to the mixture, maintaining a balanced ratio. Stir well to ensure an even distribution of ingredients. This feeding provides the revived yeast with the nutrients it needs to thrive.
- Step 6: Cover and Wait: Cover the jar loosely with a lid or cloth to allow airflow. Place the jar in a warm and draft-free environment. Allow your rehydrated sourdough starter to rest and develop for at least 6 to 8 hours, or overnight. During this period, you’ll notice bubbles forming, indicating that the yeast is active and ready for use.
- Step 7: Feed Again: After the initial fermentation, feed the starter again with equal parts flour and water. This reinforces the yeast activity and builds a healthy starter.
- Step 8: Maintain Regular Feedings: Continue feeding the starter daily or every 12 hours until it is consistently doubling in size within 4-6 hours after feeding. This indicates a strong and active starter ready for baking.
- Step 9: Test for Readiness: To ensure your rehydrated sourdough starter is ready for baking, perform the float test. Drop a small spoonful of the starter into a bowl of water; if it floats, your starter is active and ready to be incorporated into your favorite sourdough recipes.
How To Dehydrate and Rehydrate My Sourdough Starter | Final Thoughts
In the world of sourdough baking, drying out your starter turns out to be a game-changer. There are loads of advantages: a longer shelf life, easy storage, and being all set for spontaneous baking sessions. Besides just being handy for yourself, drying out your starter opens the door to spreading the happiness of sourdough with others.
Whether you’re using a dehydrator or other methods like air drying or the oven, all bakers can get in on the action. The step-by-step guide makes sure you smoothly go from drying out to storing, with careful labeling and regular checks to keep the starter top-notch.
The staying power of dried-out starters, if stored right, is pretty impressive—up to a year or even more. The rehydration process finishes the circle, bringing the starter back to life and getting it ready for another round of awesome baking adventures.
In a nutshell, getting the hang of drying out and bringing back to life your sourdough starter amps up your baking game. It gives you flexibility, convenience, and the joy of passing on a cherished tradition. So, jump into this journey, and let your dried-out sourdough starter be a reliable sidekick in your kitchen. Happy baking!
Warning: Undefined variable $post in /home/u154887947/domains/bakesmartly.com/public_html/wp-content/plugins/gourmet-core/templates/blocks/gourmet-core-block-post-related.php on line 140
Warning: Attempt to read property “ID” on null in /home/u154887947/domains/bakesmartly.com/public_html/wp-content/plugins/gourmet-core/templates/blocks/gourmet-core-block-post-related.php on line 140