The Ultimate Guide to Keep Cake Pops From Cracking
Cake pops are now a favorite treat for any event, whether a birthday bash or a wedding celebration. These yummy bites bring together the delicious taste of cake with the enjoyable and easy-to-handle aspect of a lollipop.
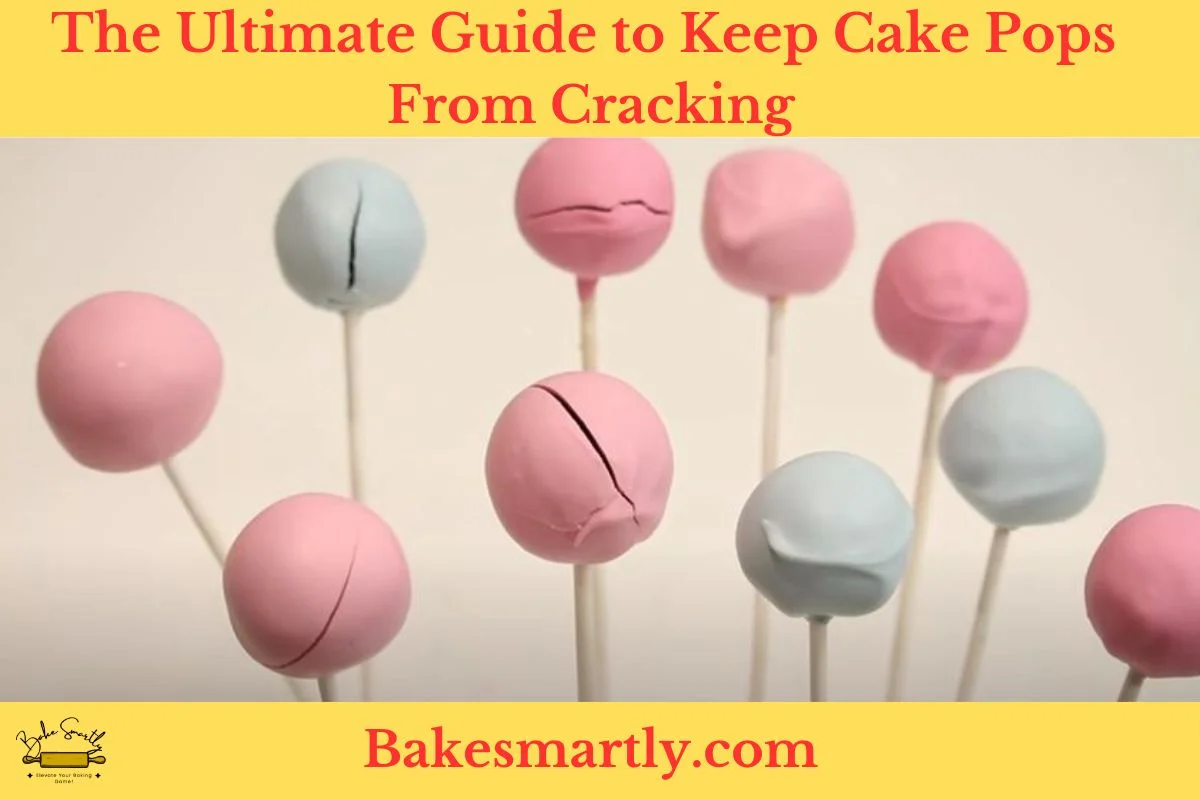
Yet, lots of folks who bake at home often deal with a common problem: their cake pops end up cracking. Don’t worry, because this complete guide is here to assist you in becoming a pro at crafting flawless cake pops every single time.
We’ll dive into the reasons behind the cracking issue and provide practical tips and tricks to make sure your cake pops come out looking perfect in every picture.
Table of Contents
ToggleWhy Your Cake Pops Are Cracking | 4 Main Reasons
Before we get into how to stop cake pops from cracking, it’s important to know why they crack in the first place.
1. Temperature Changes
One of the main reasons cake pops crack is sudden temperature shifts during the preparation and setting phases. If your cake pops move too quickly from a warm area to a colder one, or vice versa, the outer coating can contract or expand too rapidly, resulting in cracks.
To avoid this problem, make sure your cake balls are thoroughly chilled before dipping them into a melted coating. Likewise, let the coated cake pops set in a stable, room-temperature environment to prevent drastic temperature changes.
2. Moisture Levels
Another factor that contributes to cake pop cracking is the moisture content in the cake mixture. If the cake mixture is too dry or too moist, it can cause uneven expansion and contraction during the cooling and setting processes.
To achieve the right consistency, follow the recipe measurements precisely, and think about adding moisture-enhancing ingredients like extra frosting or a splash of milk if your cake mixture seems too dry. Conversely, reduce the moisture content if your cake pops consistently cracks due to excessive wetness.
3. Coating Method
How you coat your cake pops is crucial for their final appearance. If the coating is too thick, it can exert excess pressure on the cake ball, leading to cracks as it dries. On the flip side, if the coating is too thin, it might not offer enough support, resulting in a fragile surface prone to cracking.
Achieving the perfect coating thickness takes practice and precision. Dip the cake pops into the melted coating at a steady pace, allowing any excess coating to drip off. Experiment with different dipping techniques to find the balance that works best for you.
4. Ingredient Quality
The ingredients you use in both the cake and coating can significantly affect the overall stability of your cake pops. Inferior ingredients or incorrect measurements can result in a cake that is either too crumbly or too dense, making it more susceptible to cracking.
Invest in high-quality ingredients, and measure each component accurately to ensure a well-balanced and structurally sound cake pop. Additionally, use a reliable melting chocolate or candy coating for the outer layer, as low-quality options may not be set properly, contributing to cracks.

Six Expert Tips to Prevent Cake Pops from Cracking
Cake pops can end up with unsightly cracks during shaping or drying, leaving bakers frustrated. But don’t worry! We’ve got six expert tips to help you prevent those cracks and achieve perfect cake pops every time.
Get the Cake Texture Right
The key to fantastic cake pops is the texture of the cake itself. Make sure your cake is moist without being too dense before you start shaping. Overmixing can lead to a too-tight crumb structure, making your cake pops prone to cracks.
Follow your recipe closely and think about using ingredients like sour cream or buttermilk for added moisture without sacrificing structure.
Balance Your Cake-to-Frosting Ratio
Finding the right balance between cake and frosting is crucial. While frosting binds the cake crumbs, too much can make the mixture overly sticky and hard to shape. Too little frosting, on the other hand, can result in dry cake pops.
Aim for a texture that holds its shape without being too wet. Gradually add frosting to your crumbled cake until you get a consistency that lets you form smooth, crack-resistant cake balls.
Chill and Set Properly
After shaping your cake pops, it’s crucial to let them chill properly. Refrigerate them for at least 15 to 30 minutes, or until they’re firm to the touch. This not only helps the cake pops keep their shape but also prevents cracking during the coating process.
Be patient during this step; rushing can lead to structural issues. Once adequately chilled, proceed with confidence, knowing your cake pops are well-set.
Keep Consistent Sizes
Consistency in size is key to preventing cracks. Ensure your cake balls are shaped consistently, as variations can lead to uneven drying and cracking. Use a cookie scoop or your hands to measure equal portions of the cake mixture for each pop.
This not only aids in even drying but also ensures an attractive display when it’s time to present your cake pops.
Master the Coating Technique
The coating process is where many bakers encounter issues leading to cracks. Make sure your candy coating is at the right consistency – not too thick, not too thin. If it’s too thick, it can pressure the cake pops, causing cracks as it dries.
Conversely, if it’s too thin, it might not provide enough support. Dip the cake pop into the coating with a smooth, steady motion, letting any excess coating drip off. Experiment with different dipping techniques to find what works best for you.
Be Mindful During the Drying
Once your cake pops are coated, the drying process is crucial to prevent cracks. Stand the cake pops upright in a sturdy base, ensuring they don’t touch each other. Consider using styrofoam or a cake pop stand for this purpose.
Avoid the refrigerator, as temperature differences can cause cracks. Instead, let the cake pops air-dry at room temperature. Patience is key; give them plenty of time to set completely before handling or packaging.
How to Fix Cracks in Cake Pops in 3 Easy Methods
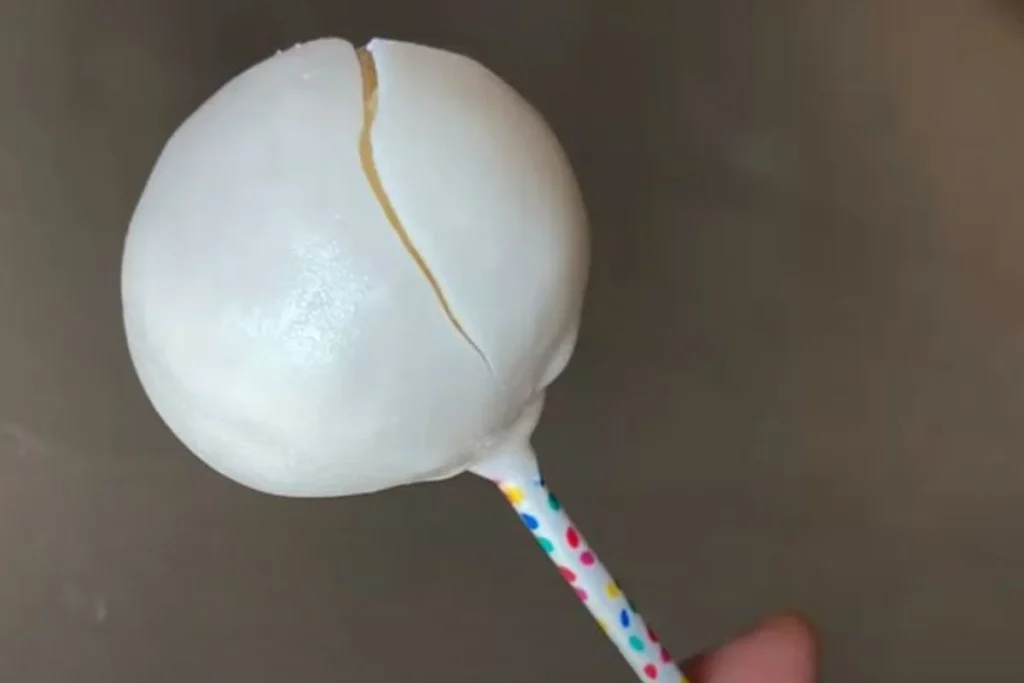
“All your best efforts to prevent cracks in cake pops may not always succeed, and it can be disheartening when they occur. However, fear not – there are effective methods to save your sweet creations.
In this section, we will explore three easy techniques to fix cracks and ensure that your cake pops maintain their visual appeal.
Method 1: Chocolate Coating Rescuer
One of the most straightforward methods to fix cracks in cake pops involves a quick rescue with a chocolate coating. Begin by melting a small amount of chocolate, either white, milk, or dark, depending on your preference.
Ensure the chocolate is smooth and lump-free. Take your cracked cake pop and dip it into the melted chocolate, making sure to cover the entire surface. Next, gently tap the cake pop on the edge of the bowl to remove any excess chocolate.
Place the coated cake pop on a parchment paper-lined tray and allow it to set. The chocolate coating not only conceals the cracks but also adds an extra layer of flavor and texture to your cake pop. This method is quick, effective, and provides a delicious solution to the problem at hand.
Method 2: Cake Pop Patching
For a more hands-on approach, consider the cake pop patching method. Begin by crumbling the cracked cake pop into fine crumbs in a bowl. Add a small amount of frosting to the crumbs and mix until you achieve a dough-like consistency. The frosting acts as a binding agent, helping to hold the cake pop together.
Take a small portion of the mixture and mold it around the cracked area, smoothing it with your fingers to create a seamless surface. Once the crack is patched, place the cake pop back on the tray and allow it to set.
This method not only fixes cracks but also provides an opportunity to get creative with different frosting flavors, adding a unique twist to your cake pops.
Method 3: Double-Dipping Perfection
For a flawless finish and an extra layer of flavor, the double-dipping method is a go-to solution. Start by dipping your cracked cake pop into melted chocolate, following the same steps as in Method 1. Allow the chocolate to set completely. Once set, dip the cake pop again, this time in a contrasting or complementary chocolate color.
The double-dipping not only covers the cracks but also creates a visually appealing two-tone effect. This method is perfect for elevating the aesthetic appeal of your cake pops, making them stand out as a delicious and eye-catching treat.

Troubleshooting Common Issues
Two common situations where cracks might show up are after coating and during the cooling process. Let’s dig into each problem and explore practical ways to fix them.
1. Cake Pops Cracking After Coating
Coating your cake pops is a crucial step, and finding cracks afterward can be pretty disappointing. One common reason for this issue is the temperature of the coating. If the chocolate or candy coating is too hot, it can make the cake inside expand, causing cracks as it cools. To troubleshoot, make sure your coating is at the right temperature before dipping. Use a candy thermometer to check and adjust accordingly.
Another thing to think about is the thickness of the coating. If it’s too thick, it can stress the cake pop, leading to cracks during the cooling process. Aim for a thin, even coating to help the cake pop and maintain its structure as it sets.
The type of chocolate or coating you use can also affect the likelihood of cracks. Experiment with different brands and types to find what works best for your recipe. Adding a bit of vegetable oil or paramount crystals to your coating can improve its consistency and reduce the risk of cracking.
2. Cake Pops Cracking During Cooling
Dealing with cracks during the cooling phase is another challenge for bakers. Rapid temperature changes can make the cake contract unevenly, resulting in cracks. To prevent this, let your coated cake pops cool gradually at room temperature. Avoid putting them in the refrigerator right away, as the sudden temperature change can contribute to cracking.
If cracks happen during cooling, there’s a quick fix you can try. Melt a small amount of the coating and use it to “glue” the cracks back together. Smooth the surface with a clean utensil, and let it set. This method can save cracked cake pops and keep them looking good.
Final Thoughts
In conclusion, getting good at making awesome cake pops means you need to figure out how to deal with a common problem – cracking. To make sure you always get perfect results, you have to tackle the main issues like changes in temperature, moisture levels, coating methods, and the quality of your ingredients.
The expert tips I’ve given you cover everything you need to know, stressing how important it is to get the right texture, balance your frosting, chill things properly, keep your sizes consistent, use good coating techniques, and let your pops dry the right way.
And for those cracks that just happen sometimes, I’ve got three cool methods to fix them – the Chocolate Coating Rescuer, Cake Pop Patching, and Double-Dipping Perfection.
With these tips, bakers can confidently handle any problems with coating and cooling, making cake pops that look amazing and taste delicious.
Lindsey Mackenzie
About me
Hi there! I’m Lindsey Mackenzie, the founder of Bake Smartly. Baking has been my passion since childhood, growing up in my father’s bakery. With Bake Smartly, I’m excited to share my love for all things sweet and savory. Join me on this delicious journey as we whip up scrumptious treats and sprinkle joy into every bite!

