5 Common Reasons Why Your Dough Isn’t Smooth (And How to Fix It)
Creating smooth and perfect dough is an essential skill for any aspiring baker. Whether you’re making bread, pizza, or pastries, achieving a smooth dough consistency is crucial for a successful bake. However, there are times when your dough doesn’t turn out as smooth as you’d like it to be.
In this article, we will explore the five common reasons why your dough isn’t smooth and provide effective solutions to fix it. By understanding these issues and implementing the suggested fixes, you’ll be well on your way to creating flawless dough every time.
Table of Contents
Toggle1. Insufficient Kneading
What causes insufficient kneading?
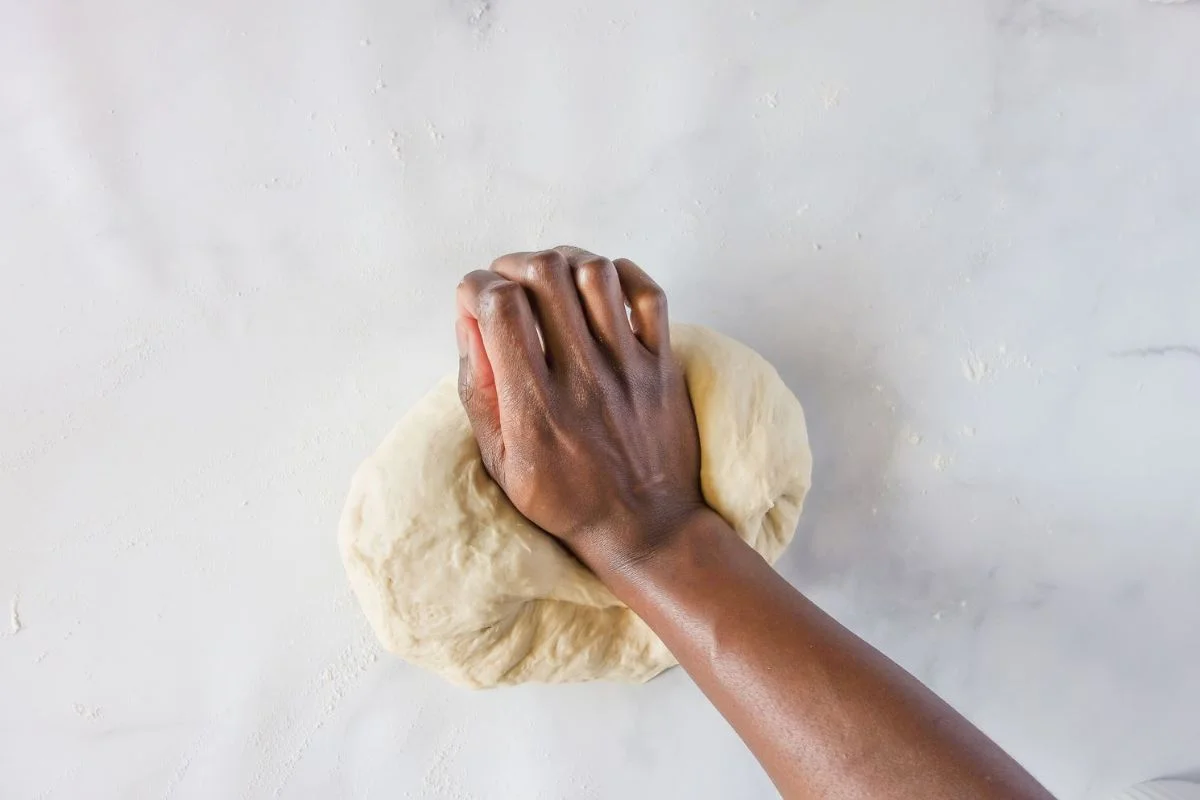
Insufficient kneading is one of the primary reasons why your dough may not be smooth. Kneading is the process of working the dough to develop gluten, which gives it structure and elasticity. When the dough is not kneaded enough, the gluten strands remain underdeveloped, resulting in a dense and rough texture.
How to fix insufficient kneading?
To fix this issue, make sure you knead the dough for an adequate amount of time. This can vary depending on the recipe, but a good rule of thumb is to knead for at least 10-15 minutes. Proper kneading involves stretching, folding, and pushing the dough, allowing the gluten to develop fully.
You can also perform the “windowpane test” to check if the gluten has developed sufficiently. Take a small piece of dough and stretch it gently. If it forms a thin, translucent membrane without tearing, the gluten is well-developed.

2. Incorrect Flour-to-Water Ratio
What causes an incorrect flour-to-water ratio?
The ratio of flour to water in your dough is crucial for achieving the right consistency. If you add too much flour, the dough becomes dry and difficult to work with, resulting in a rough texture. On the other hand, adding too much water can make the dough sticky and challenging to handle.
How to fix an incorrect flour-to-water ratio?
To fix this issue, it’s important to measure your ingredients accurately. Use a kitchen scale to weigh the flour and water for precise measurements. If your dough feels dry, gradually add small amounts of water while kneading until it reaches the desired consistency.
Conversely, if the dough is sticky, add a little flour at a time until it becomes smooth and manageable. Remember, it’s easier to add more liquid or flour as needed than to rectify an overly dry or wet dough.
3. Insufficient Resting Time
What causes insufficient resting time?
Resting the dough is crucial as it allows the gluten, the protein in the dough, to unwind and the moisture to spread uniformly. This process leads to a more desirable texture, ensuring a smoother and softer end product.
On the contrary, insufficient resting time can cause various issues, such as difficulties in shaping the dough and a lack of elasticity. Therefore, giving the dough ample resting time is essential for achieving a well-formed and elastic dough.
How to fix insufficient resting time?
To fix this issue, ensure that you follow the recipe’s recommended resting time. This could range from a few minutes to several hours, depending on the type of dough. During this resting period, cover the dough with a damp cloth or plastic wrap to prevent it from drying out. This will allow the gluten to relax and the moisture to be absorbed evenly, resulting in a smoother texture. Patience is key when it comes to resting dough, so resist the temptation to rush this important step.
4. Incorrect Yeast Activation
What causes incorrect yeast activation?
Yeast plays a vital role in the leavening process of dough, imparting a delightful lightness and airiness to the final product. Activating the yeast properly is crucial for achieving optimal fermentation.
When yeast is not activated correctly, it can result in an uneven fermentation process, leading to a dough that is dense and lumpy instead of light and airy. Therefore, ensuring proper activation of yeast is essential for obtaining the desired texture and consistency in your dough.
How to fix incorrect yeast activation?
To fix this issue, it’s crucial to activate the yeast correctly. Start by checking the expiry date of your yeast to ensure it’s still fresh. Dissolve the yeast in warm water (around 105°F-115°F) and add a pinch of sugar to provide food for the yeast. Let it sit for 5-10 minutes until it becomes frothy. If the mixture doesn’t foam or show any signs of activity,
it’s likely that your yeast is no longer active. In this case, discard the mixture and start again with fresh yeast. By activating the yeast properly, you’ll ensure a smooth and well-risen dough.
5. Incorrect Mixing Technique
What causes incorrect mixing technique?
The mixing process for dough is a critical factor that greatly influences its ultimate texture. Both overmixing and undermixing can cause problems with gluten development, leading to an undesirable outcome.
Overmixing can cause excessive gluten formation, resulting in a dough that becomes tough and chewy. Conversely, undermixing can lead to insufficient gluten development, leaving the dough lacking in structure and prone to crumbling.
Striking the right balance and achieving the ideal mixing time is essential for attaining a smooth and perfectly textured dough.
How to fix incorrect mixing technique?
To fix this issue, it’s important to follow the recommended mixing instructions for your recipe. Whether you’re using a stand mixer, hand mixer, or mixing by hand, make sure to mix the ingredients until they are just combined. Overmixing can lead to excessive gluten development, resulting in a tough and chewy texture.
Conversely, undermixing can leave pockets of unmixed ingredients, leading to an uneven texture. Remember to scrape down the sides of the bowl periodically to ensure even mixing. By mastering the proper mixing technique, you’ll achieve a smooth and well-incorporated dough.
Tips for Achieving Smooth Dough Every Time
Creating smooth and perfect dough is a combination of technique, patience, and attention to detail. To help you achieve smooth dough consistently, here are some valuable tips to keep in mind:
- Measure accurately: Use a kitchen scale to measure your ingredients accurately, especially flour and water. Precise measurements ensure the right consistency and prevent issues like a dry or sticky dough.
- Knead thoroughly: Dedicate enough time and effort to kneading the dough. Follow the recommended kneading time in your recipe and make sure to stretch, fold, and push the dough to develop gluten fully.
- Practice the windowpane test: Perform the windowpane test to check if the gluten has developed properly. Take a small piece of dough and gently stretch it. If it forms a thin, translucent membrane without tearing, the gluten is well-developed.
- Allow ample resting time: Don’t rush the resting time recommended in your recipe. This period allows the gluten to relax and the moisture to distribute evenly, resulting in a smoother texture. Cover the dough to prevent drying out during resting.
- Activate yeast correctly: Ensure your yeast is fresh and activate it properly before incorporating it into the dough. Dissolve the yeast in warm water with a pinch of sugar and let it sit until it becomes frothy and active.
- Maintain the right flour-to-water ratio: Pay attention to the ratio of flour to water in your recipe. Gradually add small amounts of water if the dough is dry or a little flour if it’s sticky, adjusting until you achieve the desired consistency.
- Follow the recommended mixing technique: Whether using a mixer or mixing by hand, follow the recommended mixing instructions in your recipe. Avoid overmixing, which can result in excessive gluten development, or undermixing, which can leave unmixed ingredients.
- Experiment with different flours: Different types of flours have varying protein content, which affects gluten development. Explore different flours like bread flour, all-purpose flour, or whole wheat flour to find the one that gives you the desired smoothness.
- Use proper dough handling techniques: Handle the dough gently during shaping and avoid excessive stretching or rough handling, which can disrupt the gluten structure. Treat the dough with care to maintain its smoothness.
- Practice and observe: Baking is a skill that improves with practice and observation. Take note of the texture and consistency of your dough at different stages and adjust your techniques accordingly. Over time, you’ll develop a keen sense of what makes a dough smooth.
Frequently Asked Questions | Why Your Dough Isn’t Smooth
How can I tell if my dough needs more kneading?
To determine if your dough needs more kneading, perform the windowpane test. Take a small piece of dough and stretch it gently. If it forms a thin, translucent membrane without tearing, the gluten is well-developed. If it tears easily, continue kneading for a few more minutes.
Can I use instant yeast instead of active dry yeast?
Yes, you can use instant yeast as a substitute for active dry yeast. Instant yeast can be added directly to the dry ingredients without the need for activation. Keep in mind that the rising time may be slightly different, so adjust accordingly.
Can I knead dough by hand if I don’t have a mixer?
Yes, you can knead dough by hand if you don’t have a mixer. It may require a bit more effort and time, but it is entirely possible to achieve smooth dough by hand kneading. Follow the same techniques of stretching, folding, and pushing the dough until it becomes elastic and smooth.
How long should I let my dough rest?
The resting time for dough can vary depending on the recipe. It could range from a few minutes to several hours. Follow the recipe’s instructions for the recommended resting time and ensure that you cover the dough to prevent it from drying out.
Can I fix a dry dough?
Yes, you can fix a dry dough by gradually adding small amounts of water while kneading. Incorporate the water slowly until the dough reaches the desired consistency. Remember to knead the dough thoroughly to ensure even hydration.
Conclusion
Achieving smooth dough is a skill that can elevate your baking creations to new heights. By understanding the common reasons why your dough isn’t smooth and implementing the fixes discussed in this article, you’ll be well-equipped to troubleshoot and rectify any issues that arise.
Remember to knead the dough thoroughly, maintain the correct flour-to-water ratio, allow sufficient resting time, activate the yeast properly, and master the correct mixing technique. With practice and attention to detail, you’ll soon be creating flawless dough every time. Happy baking!
Lindsey Mackenzie
About me
Hi there! I’m Lindsey Mackenzie, the founder of Bake Smartly. Baking has been my passion since childhood, growing up in my father’s bakery. With Bake Smartly, I’m excited to share my love for all things sweet and savory. Join me on this delicious journey as we whip up scrumptious treats and sprinkle joy into every bite!


